前回のエントリで、Apache Solrのインストールをやったので、今度はコアの作成とサンプルのドキュメントを登録してみます。
Solrでは、コアという単位で設定やインデックスの保持を行うみたいですね。
以降の操作の前提として、Solr 5.3.0のインストールディレクトリをカレントディレクトリとします。
$ cd solr-5.3.0
コアの作成
コアの作成は、「bin/solr create」コマンドで行います。
オプションなどを知りたい場合は、「-help」を付けて実行。
$ bin/solr create -help

Usage: solr create [-c name] [-d confdir] [-n configName] [-shards #] [-replicationFactor #] [-p port]

  Create a core or collection depending on whether Solr is running in standalone (core) or SolrCloud
  mode (collection). In other words, this action detects which mode Solr is running in, and then takes
  the appropriate action (either create_core or create_collection). For detailed usage instructions, do:

    bin/solr create_core -help

       or

    bin/solr create_collection -help
今回は、「mycore」というコアを作成してみます。「-c」で、コアの名前を指定します。
$ bin/solr create -c mycore
結果。
Setup new core instance directory:
/var/solr/data/mycore

Creating new core 'mycore' using command:
http://localhost:8983/solr/admin/cores?action=CREATE&name=mycore&instanceDir=mycore

{
  "responseHeader":{
    "status":0,
    "QTime":655},
  "core":"mycore"}
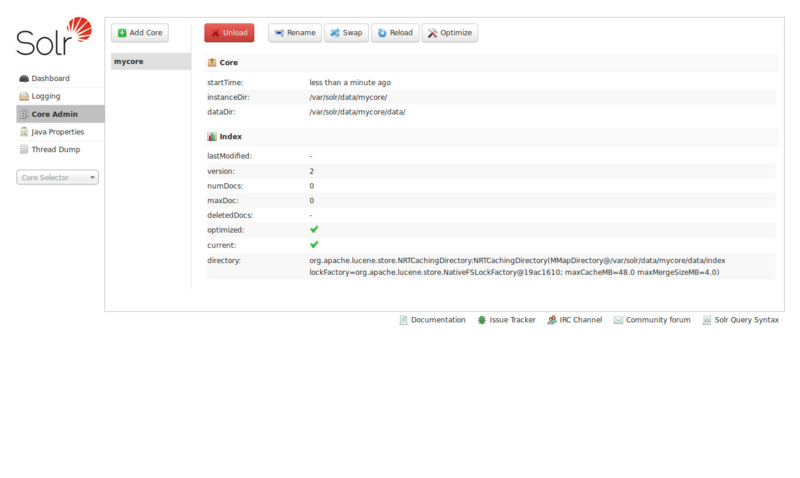
管理画面で、「http://localhost:8983/solr/#/~cores/mycore」にアクセスすると、このような結果に。

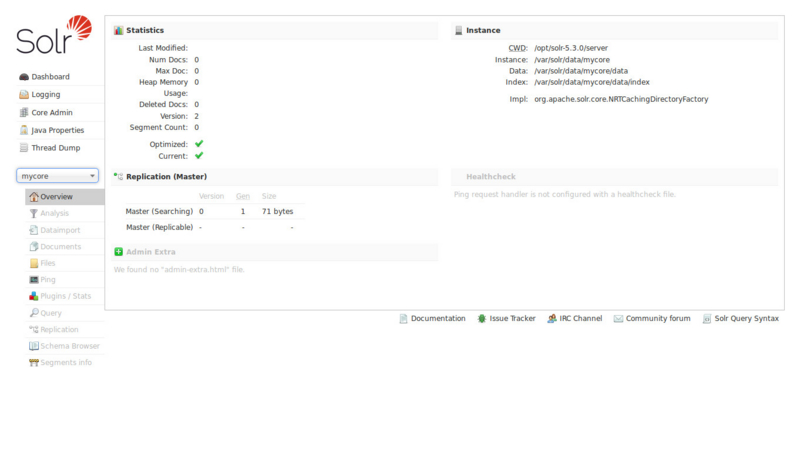
また、「http://localhost:8983/solr/#/mycore」の場合はこのような結果に。

とりあえず、コアはできた模様です。
サンプルドキュメントの登録
続いて、サンプルドキュメントを登録してみます。Runninng SolrドキュメントのAdd Documentsに習い、データ登録。
Running Solr / Add Documents
https://cwiki.apache.org/confluence/display/solr/Running+Solr
「-c」で、コアの名前を指定する、と。
$ bin/post -c mycore example/exampledocs/*.xml
なんか、入ったっぽいです。
java -classpath /opt/solr-5.3.0/dist/solr-core-5.3.0.jar -Dauto=yes -Dc=mycore -Ddata=files org.apache.solr.util.SimplePostTool example/exampledocs/gb18030-example.xml example/exampledocs/hd.xml example/exampledocs/ipod_other.xml example/exampledocs/ipod_video.xml example/exampledocs/manufacturers.xml example/exampledocs/mem.xml example/exampledocs/money.xml example/exampledocs/monitor.xml example/exampledocs/monitor2.xml example/exampledocs/mp500.xml example/exampledocs/sd500.xml example/exampledocs/solr.xml example/exampledocs/utf8-example.xml example/exampledocs/vidcard.xml
SimplePostTool version 5.0.0
Posting files to [base] url http://localhost:8983/solr/mycore/update...
Entering auto mode. File endings considered are xml,json,csv,pdf,doc,docx,ppt,pptx,xls,xlsx,odt,odp,ods,ott,otp,ots,rtf,htm,html,txt,log
POSTing file gb18030-example.xml (application/xml) to [base]
POSTing file hd.xml (application/xml) to [base]
POSTing file ipod_other.xml (application/xml) to [base]
POSTing file ipod_video.xml (application/xml) to [base]
POSTing file manufacturers.xml (application/xml) to [base]
POSTing file mem.xml (application/xml) to [base]
POSTing file money.xml (application/xml) to [base]
POSTing file monitor.xml (application/xml) to [base]
POSTing file monitor2.xml (application/xml) to [base]
POSTing file mp500.xml (application/xml) to [base]
POSTing file sd500.xml (application/xml) to [base]
POSTing file solr.xml (application/xml) to [base]
POSTing file utf8-example.xml (application/xml) to [base]
POSTing file vidcard.xml (application/xml) to [base]
14 files indexed.
COMMITting Solr index changes to http://localhost:8983/solr/mycore/update...
Time spent: 0:00:00.741
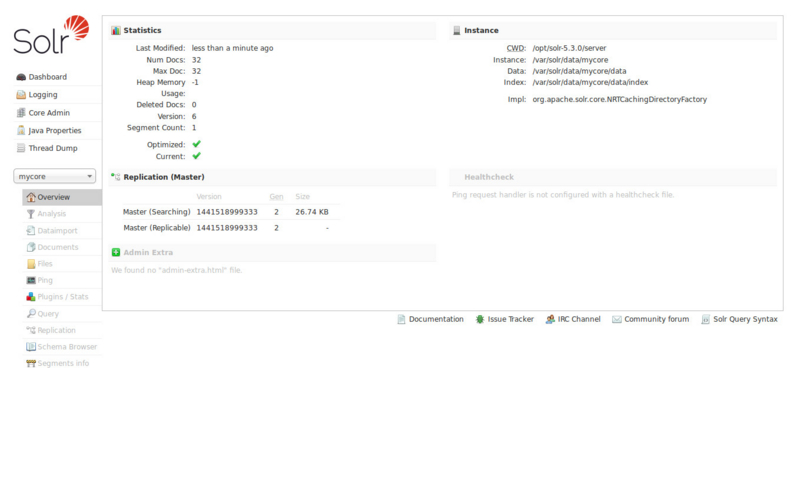
再度「http://localhost:8983/solr/#/mycore」にアクセスすると、ドキュメントが登録されていることがわかります。

簡単に検索してみる
それでは、軽く検索してみましょう。とりあえず、Running Solrのドキュメント(Ask Questions)に習って…。
curlでやる場合は、こんな感じ。
$ curl 'http://localhost:8983/solr/mycore/select?wt=json&q=video'
結果。
{"responseHeader":{"status":0,"QTime":1,"params":{"q":"video","wt":"json"}},"response":{"numFound":3,"start":0,"docs":[{"id":"MA147LL/A","name":["Apple 60 GB iPod with Video Playback Black"],"manu":["Apple Computer Inc."],"manu_id_s":"apple","cat":["electronics","music"],"features":["iTunes, Podcasts, Audiobooks","Stores up to 15,000 songs, 25,000 photos, or 150 hours of video","2.5-inch, 320x240 color TFT LCD display with LED backlight","Up to 20 hours of battery life","Plays AAC, MP3, WAV, AIFF, Audible, Apple Lossless, H.264 video","Notes, Calendar, Phone book, Hold button, Date display, Photo wallet, Built-in games, JPEG photo playback, Upgradeable firmware, USB 2.0 compatibility, Playback speed control, Rechargeable capability, Battery level indication"],"includes":["earbud headphones, USB cable"],"weight":[5.5],"price":[399.0],"popularity":[10],"inStock":[true],"store":["37.7752,-100.0232"],"manufacturedate_dt":"2005-10-12T08:00:00Z","_version_":1511563901060251648},{"id":"EN7800GTX/2DHTV/256M","name":["ASUS Extreme N7800GTX/2DHTV (256 MB)"],"manu":["ASUS Computer Inc."],"manu_id_s":"asus","cat":["electronics","graphics card"],"features":["NVIDIA GeForce 7800 GTX GPU/VPU clocked at 486MHz","256MB GDDR3 Memory clocked at 1.35GHz","PCI Express x16","Dual DVI connectors, HDTV out, video input","OpenGL 2.0, DirectX 9.0"],"weight":[16.0],"price":[479.95],"popularity":[7],"store":["40.7143,-74.006"],"inStock":[false],"manufacturedate_dt":"2006-02-13T00:00:00Z","_version_":1511563901222780928},{"id":"100-435805","name":["ATI Radeon X1900 XTX 512 MB PCIE Video Card"],"manu":["ATI Technologies"],"manu_id_s":"ati","cat":["electronics","graphics card"],"features":["ATI RADEON X1900 GPU/VPU clocked at 650MHz","512MB GDDR3 SDRAM clocked at 1.55GHz","PCI Express x16","dual DVI, HDTV, svideo, composite out","OpenGL 2.0, DirectX 9.0"],"weight":[48.0],"price":[649.99],"popularity":[7],"inStock":[false],"manufacturedate_dt":"2006-02-13T00:00:00Z","store":["40.7143,-74.006"],"_version_":1511563901226975232}]}}
OKそうです。
コアの削除
最後に、コアの削除。「bin/solr delete」で行います。「-c」で、コアの名前を指定。
$ bin/solr delete -c mycore
結果。
Deleting core 'mycore' using command:
http://localhost:8983/solr/admin/cores?action=UNLOAD&core=mycore&deleteIndex=true&deleteDataDir=true&deleteInstanceDir=true

{"responseHeader":{
    "status":0,
    "QTime":23}}
簡単ではありますが、まずはコアの作成/削除ができるようになりました、と。

