これは、なにをしたくて書いたもの?
- OpenShift上では、rootや特定のUIDを前提に構成されたコンテナは、うまく動かないそうな
- そういう時にどうしたらいいのか?また、強引(?)に回避する方法などはあるのか?ということを知りたい
- ※ある種、強引に動かすようなアプローチを取った時に、セキュリティリスクを背負うことになるのはなんとなく知っている
というあたりの事情を確認、調べたくて書いたエントリです。
試してみること
まずは、rootを前提にしたコンテナをOKD(Minishift)上に放り込みます。
そこでうまく動かないことを確認し、それから特定のUIDを期待するコンテナを作成していくつか確認をしていこうと思います。
参考情報
参考にしたのは、このあたり。
Getting any Docker image running in your own OpenShift cluster – Red Hat OpenShift Blog
OpenShift にデプロイするとき権限でハマる | blog-kazuhisya
OpenShiftでUID指定されているコンテナをデプロイする - nekop's blog
環境
今回の確認環境は、こちらです。
$ minishift version
minishift v1.24.0+8a904d0


$ oc version
oc v3.10.0+dd10d17
kubernetes v1.10.0+b81c8f8
features: Basic-Auth GSSAPI Kerberos SPNEGO

Server https://192.168.42.109:8443
openshift v3.10.0+fd501dd-48
kubernetes v1.10.0+b81c8f8
例えば
例えば、OKDにnginxのDockerイメージを放り込んでみます。
$ oc new-app nginx:1.15.4
このイメージは、起動できません。
$ oc get pod
NAME            READY     STATUS             RESTARTS   AGE
nginx-1-b7jnw   0/1       CrashLoopBackOff   1          48s
「oc debug」でコンテナに入ってUIDを確認してみると、よくわからない値になっています。
$ oc debug dc/nginx
Defaulting container name to nginx.
Use 'oc describe pod/nginx-debug -n myproject' to see all of the containers in this pod.

Debugging with pod/nginx-debug, original command: nginx -g daemon off;
Waiting for pod to start ...
Pod IP: 172.17.0.6
If you don't see a command prompt, try pressing enter.

$ id
uid=1000120000 gid=0(root) groups=0(root),1000120000
gidは、「0」(root)ですね。
このあたりの事情は、Security Context Constraints、イメージ作成のガイドラインを見ることになります。
Managing Security Context Constraints | Cluster Administration | OKD 3.10
Guidelines | Creating Images | OKD 3.10
特定のユーザーを前提にしたコンテナを作ってデプロイしてみる
それでは、ここからは特定のユーザーを前提にしたコンテナを作って、デプロイしてみましょう。そのコンテナを少しずつ
変えたり、OKD側の設定を変えたりしながら、動くようにしていってみます。
管理者権限があった方がよい部分もあるのですが、今回は「developer」ユーザーを使用し、
必要に応じて「--as system:admin」を付けていく方針にします。
$ oc whoami
developer
今回用のプロジェクトを作成。
$ oc new-project sandbox
次のような、Dockerfileを用意します。
Dockerfile
FROM ubuntu:latest

RUN apt-get update -y && \
           apt-get install -y python3 wget unzip && \
           apt-get clean

RUN adduser --disabled-login --gecos '' test-user

WORKDIR /home/test-user

RUN wget https://docs.python.org/ftp/python/doc/3.6.5/python-3.6.5-docs-html.zip && \
           unzip python-3.6.5-docs-html.zip && \
           chown -R test-user.test-user python-3.6.5-docs-html* && \
           chmod -R o-rx python-3.6.5-docs-html

USER test-user

ENTRYPOINT ["python3", "-m", "http.server"]
Python 3をインストールして、Pythonのドキュメントをダウンロードして、それをホームディレクトリごとWebサーバーで
公開する(雑な)イメージです。
ちょっと作為的ですが、PythonのドキュメントはDockerfile内で作成するユーザーだけで参照できるようにしています。
           chown -R test-user.test-user python-3.6.5-docs-html* && \
           chmod -R o-rx python-3.6.5-docs-html
このDockerfileを使って、BuildConfigの作成。
$ cat Dockerfile | oc new-build --name python-http --dockerfile=-
ログを確認すると、ユーザーが作成されていることが確認できます。
$ oc logs -f bc/python-http

...

Step 3/7 : RUN adduser --disabled-login --gecos '' test-user
 ---> Running in 77dd45b9045c
Adding user `test-user' ...
Adding new group `test-user' (1000) ...
Adding new user `test-user' (1000) with group `test-user' ...
Creating home directory `/home/test-user' ...
Copying files from `/etc/skel' ...
 ---> 8d8b151eb1f2
で、DeploymentConfig、Service、Routeを作って公開。
$ oc new-app python-http
$ oc create service clusterip python-http --tcp=8000:8000
$ oc expose svc/python-http
この時、コンテナに入ってuid、gidを確認すると、次のようになっています。特に、uidがよくわからない値に…。
というか、USERで指定したユーザーでもないですね。
$ oc rsh dc/python-http
$ id
uid=1000130000 gid=0(root) groups=0(root),1000130000
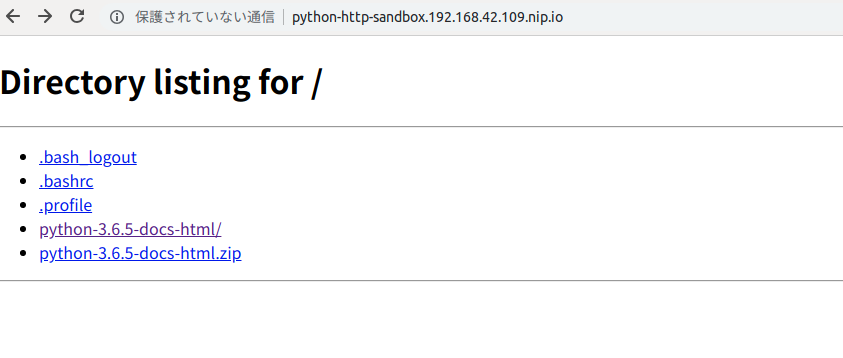
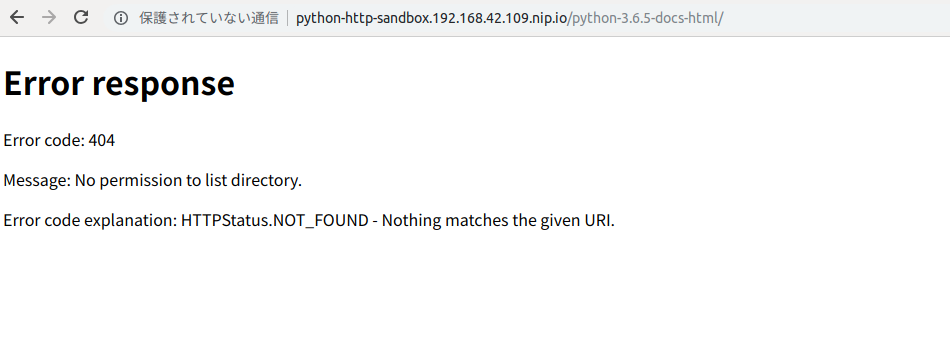
なので、この状態でWebサーバーにアクセスすると、トップページは見れますが

ダウンロードしたPythonのドキュメントはアクセスできないことになります。

コンテナに入って、ディレクトリ内に移動することもできませんね。
$ oc rsh dc/python-http
$ ls -l
total 8988
drwxr-x---. 18 test-user test-user    1209 Mar 28  2018 python-3.6.5-docs-html
-rw-r--r--.  1 test-user test-user 9202982 Mar 28  2018 python-3.6.5-docs-html.zip
$ cd python-3.6.5-docs-html
/bin/sh: 2: cd: can't cd to python-3.6.5-docs-html
さて、どうしましょう。
OKD上で動作するように、イメージを修正する
対応方法は、ドキュメントに記載があります。
OKD-Specific Guidelines / Support Arbitrary User IDs
対象のディレクトリなどの権限を、以下のように変更します。
RUN chgrp -R 0 /some/directory && \
    chmod -R g=u /some/directory
所有グループをroot(0)に、グループの権限をユーザーの権限に合わせます。
これは、OKD内で動作するコンテナ内でのユーザーが、rootグループに属していることを使っている感じですね。
ユーザーそのものはrootではありませんが。
Because the container user is always a member of the root group, the container user can read and write these files. The root group does not have any special permissions (unlike the root user) so there are no security concerns with this arrangement. In addition, the processes running in the container must not listen on privileged ports (ports below 1024), since they are not running as a privileged user.
なので、これに合わせてDockerfileを以下のように修正してみました。
RUN wget https://docs.python.org/ftp/python/doc/3.6.5/python-3.6.5-docs-html.zip && \
           unzip python-3.6.5-docs-html.zip && \
           chown -R test-user.test-user python-3.6.5-docs-html* && \
           chmod -R o-rx python-3.6.5-docs-html

RUN chgrp -R 0 python-3.6.5-docs-html && \
           chmod -R g=u python-3.6.5-docs-html

USER test-user
BuildConfigを1回削除して、Dockerfileから再度BuildConfigを作成。
$ oc delete bc/python-http
$ cat Dockerfile | oc new-build --name python-http --dockerfile=-
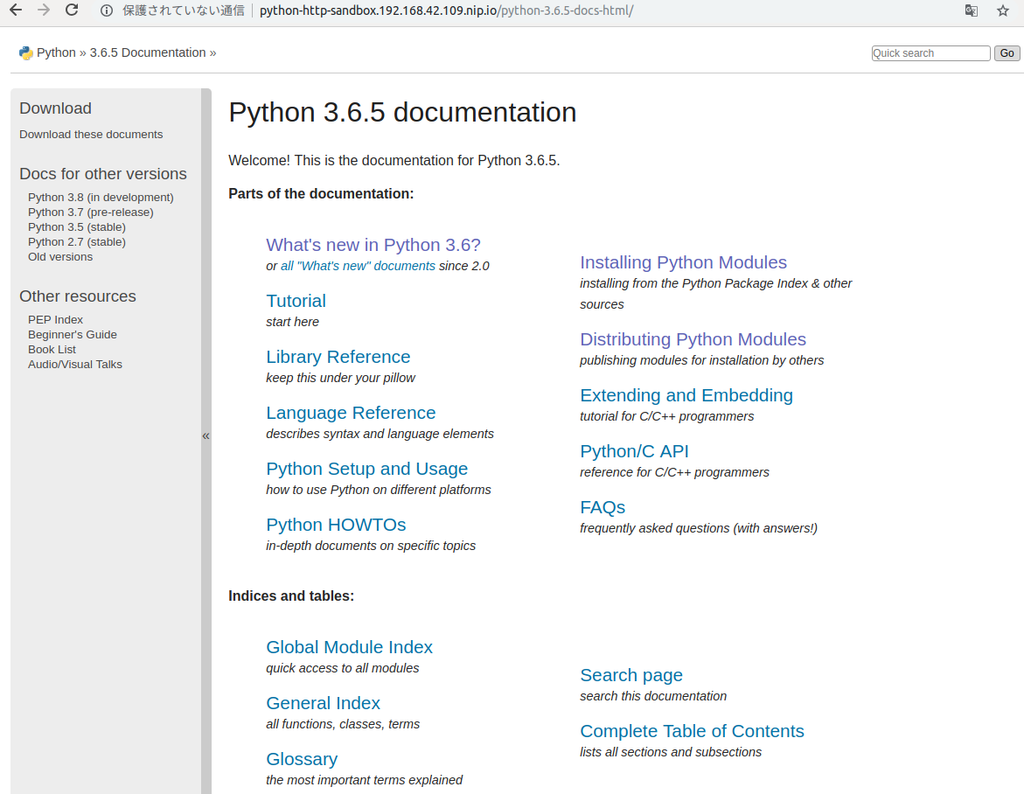
これでデプロイが完了すると、今度は見れなかったドキュメントが参照可能になります。

コンテナに入って、一応権限の確認。
$ oc rsh dc/python-http
$ ls -l
total 8988
drwxrwx---. 1 test-user root         1209 Mar 28  2018 python-3.6.5-docs-html
-rw-r--r--. 1 test-user test-user 9202982 Mar 28  2018 python-3.6.5-docs-html.zip
$ id
uid=1000140000 gid=0(root) groups=0(root),1000140000
これで、OKD Wayな感じでコンテナを動作させることができました。
指定したUIDを使うように変更する
次に、Dockerfileで指定したUIDを使うように、変更してみます。
Dockerfileは、こんな状態に戻します。
FROM ubuntu:latest

RUN apt-get update -y && \
           apt-get install -y python3 wget unzip && \
           apt-get clean

RUN adduser --disabled-login --gecos '' test-user

WORKDIR /home/test-user

RUN wget https://docs.python.org/ftp/python/doc/3.6.5/python-3.6.5-docs-html.zip && \
           unzip python-3.6.5-docs-html.zip && \
           chown -R test-user.test-user python-3.6.5-docs-html* && \
           chmod -R o-rx python-3.6.5-docs-html

USER test-user

ENTRYPOINT ["python3", "-m", "http.server"]
以下の部分は、削除しました。
RUN chgrp -R 0 python-3.6.5-docs-html && \
           chmod -R g=u python-3.6.5-docs-html
このDockerfileから作ったイメージでは、Webサーバーが公開するコンテナ内のドキュメントは参照できないままです。

ここで使うのが、Security Context Constraintsです。
$ oc get scc --as system:admin
NAME               PRIV      CAPS      SELINUX     RUNASUSER          FSGROUP     SUPGROUP    PRIORITY   READONLYROOTFS   VOLUMES
anyuid             false     []        MustRunAs   RunAsAny           RunAsAny    RunAsAny    10         false            [configMap downwardAPI emptyDir persistentVolumeClaim projected secret]
hostaccess         false     []        MustRunAs   MustRunAsRange     MustRunAs   RunAsAny    <none>     false            [configMap downwardAPI emptyDir hostPath persistentVolumeClaim projected secret]
hostmount-anyuid   false     []        MustRunAs   RunAsAny           RunAsAny    RunAsAny    <none>     false            [configMap downwardAPI emptyDir hostPath nfs persistentVolumeClaim projected secret]
hostnetwork        false     []        MustRunAs   MustRunAsRange     MustRunAs   MustRunAs   <none>     false            [configMap downwardAPI emptyDir persistentVolumeClaim projected secret]
nonroot            false     []        MustRunAs   MustRunAsNonRoot   RunAsAny    RunAsAny    <none>     false            [configMap downwardAPI emptyDir persistentVolumeClaim projected secret]
privileged         true      [*]       RunAsAny    RunAsAny           RunAsAny    RunAsAny    <none>     false            [*]
restricted         false     []        MustRunAs   MustRunAsRange     MustRunAs   RunAsAny    <none>     false            [configMap downwardAPI emptyDir persistentVolumeClaim projected secret]
この中の「nonroot」を、Service Accountに割り当てます。
ServiceAccountは、デフォルトで以下の3つがあります。
$ oc get sa
NAME       SECRETS   AGE
builder    2         28m
default    2         28m
deployer   2         28m
例えば、「default」Service Accountを見ると、こんな感じ。
$ oc describe sa/default
Name:                default
Namespace:           sandbox
Labels:              <none>
Annotations:         <none>
Image pull secrets:  default-dockercfg-skd97
Mountable secrets:   default-dockercfg-skd97
                     default-token-6qgr2
Tokens:              default-token-6qgr2
                     default-token-l5x8c
Events:              <none>
この「default」Service Accountに、「nonroot」Security Context Constraintsを割り当てます。
※「-z」オプションで、Service Accountを指定します
※デフォルトでは、「restricted」が割り当てられています
$ oc adm policy add-scc-to-user nonroot -z default --as system:admin
scc "nonroot" added to: ["system:serviceaccount:sandbox:default"]
また、Security Context Constraintsにはpriorityの設定が必要なようなので
Security Context Constraints / SCC Prioritization
「nonroot」に設定します。
$ oc patch scc nonroot -p 'priority: 9' --as system:admin
Security Context Constraintsのpriorityが、どのように選ばれていくのかという説明は、こちら。
Highest priority first, nil is considered a 0 priority
If priorities are equal, the SCCs will be sorted from most restrictive to least restrictive
If both priorities and restrictions are equal the SCCs will be sorted by name
今回は、「anyuid」が10になっているのが見えるので、とりあえず9にしてみました…。
「oc rollout」します。
$ oc rollout latest python-http
すると…うまく起動できていません…。
$ oc get pod
NAME                   READY     STATUS                       RESTARTS   AGE
python-http-1-build    0/1       Completed                    0          2m
python-http-3-lnqc8    1/1       Running                      0          2m
python-http-4-45wgv    0/1       CreateContainerConfigError   0          44s
python-http-4-deploy   1/1       Running                      0          46s
Podをdescribeすると、こんなメッセージが見えます。
$ oc describe pod/python-http-4-45wgv

...

  Warning  Failed     9s (x7 over 1m)  kubelet, localhost  Error: container has runAsNonRoot and image has non-numeric user (test-user), cannot verify user is non-root
ユーザーの指定が数値じゃないよ、と言っています…。
「nonroot」の説明を見てみましょう。「UID」を指定しろ、と書いていますね。
$ oc get scc/nonroot -o yaml --as system:admin

metadata:
  annotations:
    kubernetes.io/description: nonroot provides all features of the restricted SCC
      but allows users to run with any non-root UID.  The user must specify the UID
      or it must be specified on the by the manifest of the container runtime.
さらに、OKDのコンテナガイドラインを見てみます。
OKD-Specific Guidelines / Support Arbitrary User IDs
Lastly, the final USER declaration in the Dockerfile should specify the user ID (numeric value) and not the user name. This allows OKD to validate the authority the image is attempting to run with and prevent running images that are trying to run as root, because running containers as a privileged user exposes potential security holes. If the image does not specify a USER, it inherits the USER from the parent image.
UIDを、数値で指定をするべきみたいです。
では、ユーザーの作成時とUSER指定時に、UIDを書くようにしてみましょう。
# RUN adduser --disabled-login --gecos '' test-user
RUN adduser --disabled-login --gecos '' -u 1000 test-user

# USER test-user
USER 1000
BuildConfigを作り直し。
$ oc delete bc/python-http
$ cat Dockerfile | oc new-build --name python-http --dockerfile=-
今度は、ドキュメントが参照可能になります。

コンテナ内でも指定したUIDのユーザーが使用されていますし、権限も以下のようになっています。
$ oc rsh dc/python-http

$ id
uid=1000(test-user) gid=1000(test-user) groups=1000(test-user)
$ ls -l
total 8988
drwxr-x---. 18 test-user test-user    1209 Mar 28  2018 python-3.6.5-docs-html
-rw-r--r--.  1 test-user test-user 9202982 Mar 28  2018 python-3.6.5-docs-html.zip
確認が終わったら、「default」Service Accountから「nonroot」を外し、Priorityもnullにしておきました。
$ oc adm policy remove-scc-from-user nonroot -z default --as system:admin
scc "nonroot" removed from: ["system:serviceaccount:sandbox:default"]

$ oc patch scc nonroot -p 'priority: null' --as system:admin
securitycontextconstraints.security.openshift.io "nonroot" patched
rootで動作するコンテナを動かす
最後、rootで動作するコンテナを動かせるようにしてみます。
最初に失敗した、nginxのコンテナをOKD上で動かせるように設定します。
$ oc new-app nginx:1.15.4
これには、「anyuid」Security Context Constraintsを使用します。
Enable Images to Run with USER in the Dockerfile
「default」Service Accountに、「anyuid」を与えます。
$ oc adm policy add-scc-to-user anyuid -z default --as system:admin
すると、今度はnginxのコンテナが起動できるようになります。
$ oc get pod
NAME            READY     STATUS    RESTARTS   AGE
nginx-1-pxbcd   1/1       Running   0          1m
この方法だと、先程作成したDockerfileの場合でも、特に修正することなく動作させることができます。
Dockerfile
FROM ubuntu:latest

RUN apt-get update -y && \
           apt-get install -y python3 wget unzip && \
           apt-get clean

RUN adduser --disabled-login --gecos '' test-user

WORKDIR /home/test-user

RUN wget https://docs.python.org/ftp/python/doc/3.6.5/python-3.6.5-docs-html.zip && \
           unzip python-3.6.5-docs-html.zip && \
           chown -R test-user.test-user python-3.6.5-docs-html* && \
           chmod -R o-rx python-3.6.5-docs-html

USER test-user

ENTRYPOINT ["python3", "-m", "http.server"]
DockerfileのUSERで指定したユーザーで、動作するようになっています。
$ oc rsh dc/python-http
$ id
uid=1000(test-user) gid=1000(test-user) groups=1000(test-user)
お手軽といえばお手軽なのですが、セキュリティレベルは最低まで下がるので、こちらは極力使わない、もしくは
信頼できるイメージのみに適用する程度にするのでしょう。
確認が終わったら、「default」Service Accountから「anyuid」を削除。
$ oc adm policy remove-scc-from-user anyuid -z default --as system:admin
scc "anyuid" removed from: ["system:serviceaccount:sandbox:default"]
「nonroot」や「anyuid」を適用するイメージを絞る
ここまで、「default」Service Accountに「nonroot」や「anyuid」を付与していましたが、これだと適用されるコンテナが
広大になります。
コンテナを絞って、適用できるようにしてみようとちょっと思うわけです。そこで、Service Accountを作ってみましょう。
Understanding Service Accounts and SCCs – Red Hat OpenShift Blog
「oc create sa」で、Service Accountを作成。
$ oc create sa with-nonroot
serviceaccount "with-nonroot" created

$ oc create sa with-anyuid
serviceaccount "with-anyuid" created
Service Accountが増えました。
$ oc get sa
NAME           SECRETS   AGE
builder        2         1d
default        2         1d
deployer       2         1d
with-anyuid    2         29s
with-nonroot   2         33s
このService Accountに、それぞれ「nonroot」や「anyuid」を付与してみましょう。
$ oc adm policy add-scc-to-user nonroot -z with-nonroot --as system:admin
scc "nonroot" added to: ["system:serviceaccount:sandbox:with-nonroot"]

$ oc adm policy add-scc-to-user anyuid -z with-anyuid --as system:admin
scc "anyuid" added to: ["system:serviceaccount:sandbox:with-anyuid"]
このService Accountを使って、Security Context Constraintsをコンテナに適用してみます。
ここでは、nginxのコンテナに対して、「anyuid」を付与したService Accountで動作させるようにしてみます。
とりあえず、nginxのイメージをデプロイ。
$ oc new-app nginx:1.15.4
もちろん、失敗します。
$ oc get pod
NAME             READY     STATUS             RESTARTS   AGE
nginx-1-d6shk    0/1       CrashLoopBackOff   1          6s
nginx-1-deploy   1/1       Running            0          7s
ここで、「anyuid」を付与したService Accountを使うように、DeploymentConfigを修正してみます。
$ oc patch dc/nginx --patch '{"spec":{"template":{"spec":{"serviceAccountName": "with-anyuid"}}}}'
deploymentconfig.apps.openshift.io "nginx" patched
今度は、起動しました。
$ oc get pod
NAME            READY     STATUS    RESTARTS   AGE
nginx-2-778hq   1/1       Running   0          13s
YAMLでいくと、ここに書くことになります。
$ oc get dc/nginx -o yaml
apiVersion: apps.openshift.io/v1
kind: DeploymentConfig
metadata:

...

spec:

...

  template:

    ...

    spec:
      containers:
      - image: nginx@sha256:0b5c73966ec996a05672c4aea0a0d1910c6d7495147805ef88205bff51e119f3
        imagePullPolicy: IfNotPresent
        name: nginx
        ports:
        - containerPort: 80
          protocol: TCP
        resources: {}
        terminationMessagePath: /dev/termination-log
        terminationMessagePolicy: File
      dnsPolicy: ClusterFirst
      restartPolicy: Always
      schedulerName: default-scheduler
      securityContext: {}
      serviceAccount: with-anyuid
      serviceAccountName: with-anyuid
      terminationGracePeriodSeconds: 30

...
これですね。
      serviceAccount: with-anyuid
      serviceAccountName: with-anyuid
って、serviceAccountというのも増えてますが…。
Service Context Constraintsが、どのService Accountに割り当てられているか、確認したい
「oc describe」を使えばよいみたいです。
$ oc describe scc/anyuid --as system:admin
Name:                       anyuid
Priority:                   10
Access:
  Users:                    system:serviceaccount:sandbox:with-anyuid,system:serviceaccount:sandbox:default
  Groups:                   system:cluster-admins
Settings:
  Allow Privileged:             false
  Default Add Capabilities:         <none>
  Required Drop Capabilities:           MKNOD
  Allowed Capabilities:             <none>
  Allowed Seccomp Profiles:         <none>
  Allowed Volume Types:             configMap,downwardAPI,emptyDir,persistentVolumeClaim,projected,secret
  Allowed Flexvolumes:              <all>
  Allow Host Network:               false
  Allow Host Ports:             false
  Allow Host PID:               false
  Allow Host IPC:               false
  Read Only Root Filesystem:            false
  Run As User Strategy: RunAsAny
    UID:                    <none>
    UID Range Min:              <none>
    UID Range Max:              <none>
  SELinux Context Strategy: MustRunAs
    User:                   <none>
    Role:                   <none>
    Type:                   <none>
    Level:                  <none>
  FSGroup Strategy: RunAsAny
    Ranges:                 <none>
  Supplemental Groups Strategy: RunAsAny
    Ranges:                 <none>
この例だと、「anyuid」Security Context Constraintsが「default」と「with-anyuid」Service Accountに割り当てられています。
Access:
  Users:                 system:serviceaccount:sandbox:with-anyuid,system:serviceaccount:sandbox:default
  Groups:                    system:cluster-admins
そういえば、デフォルトの「restricted」ってどうなのでしょう?
$ oc describe scc/restricted --as system:admin
Name:                       restricted
Priority:                   <none>
Access:
  Users:                    <none>
  Groups:                   system:authenticated
Settings:
  Allow Privileged:             false
  Default Add Capabilities:         <none>
  Required Drop Capabilities:           KILL,MKNOD,SETUID,SETGID
  Allowed Capabilities:             <none>
  Allowed Seccomp Profiles:         <none>
  Allowed Volume Types:             configMap,downwardAPI,emptyDir,persistentVolumeClaim,projected,secret
  Allowed Flexvolumes:              <all>
  Allow Host Network:               false
  Allow Host Ports:             false
  Allow Host PID:               false
  Allow Host IPC:               false
  Read Only Root Filesystem:            false
  Run As User Strategy: MustRunAsRange
    UID:                    <none>
    UID Range Min:              <none>
    UID Range Max:              <none>
  SELinux Context Strategy: MustRunAs
    User:                   <none>
    Role:                   <none>
    Type:                   <none>
    Level:                  <none>
  FSGroup Strategy: MustRunAs
    Ranges:                 <none>
  Supplemental Groups Strategy: RunAsAny
    Ranges:                 <none>
Groupsに「system:authenticated」が指定されている、と。
Access:
  Users:                 <none>
  Groups:                    system:authenticated
まとめ
OKD上で、特定のUIDやrootを使用するイメージを動かす方法を調べてみました。
OKDのドキュメントにあるように、このようなコンテナを動かすのはご法度として捉えるのでしょうが、それを承知で使う場合の
方法は押さえることができました。
Security Context ConstraintsやService Accountについて、もうちょっと理解しないとですねぇ。