これは、なにをしたくて書いたもの?
WilddFly Elytron OpenID Clientサブシステムを使うと、OpenID Connectを使った認証ができるということなので、ちょっと試してみようかなと。
OpenID ConnectのProviderとしては、Keycloakを使います。
WildFlyとKeycloakアダプター
もともと、このテーマを扱ってみようと思ったのは次のブログエントリーがきっかけです。
Deprecation of Keycloak adapters - Keycloak
Keycloakが提供しているアダプターは非推奨になり、OAuth 2.0やOpenID Connectの他のライブラリを使うように示唆されており、
その代替案の1部を示したものが上記ブログエントリーになります。
その中でWildFlyについては25からOpenID Connectがネイティブサポートされているらしく、WildFly Elytronにブログエントリーが書かれています。
Elytron: Securing WildFly Apps with OpenID Connect
elytron-oidc-clientサブシステムを使って、OpenID Connectを扱えるようにする内容ですね。
WildFly Elytron
そもそもWildFly Elytronとは?ということなのですが、アプリケーションサーバーとクライアントサイドのセキュリティのためのJava APIとSPIを
指すようです。
WildFly Elytron is a set of Java APIs and SPIs for application server and client side security.
WildFly 10から同梱されるようになった、それまでのセキュリティフレームワークを置き換えるもののようです。
Elytron: A New Security Framework in WildFly/JBoss EAP | Red Hat Developer
ドキュメントはこちら。
Elytron: WildFly Elytron Documentation
といっても、このページにあるのはほとんどがAPIリファレンスで、実体はWildFlyのガイドになります。
WildFly Elytron OpenID Connect Clientサブシステム
ここまでWildFly Elytronについて書いてきましたが、今回のお題で使うのはWildFly Elytron OpenID Connect Clientサブシステムになります。
WildFly Elytron OpenID Connect Clientサブシステムについては、WildFlyの管理ガイドに書かれています。
こちらとこのブログエントリーを見つつ、進めていきましょう。
Elytron: Securing WildFly Apps with OpenID Connect
このブログエントリーにはサンプルの記載があり、GitHub上で公開されています。
https://github.com/wildfly-security-incubator/elytron-examples/tree/main/simple-webapp-oidc
見るのはこのあたりでしょうね。
あと、こちらも参考にしました。
Secure WildFly applications with OpenID Connect - Mastertheboss
お題
今回は、以下のお題にしたいと思います。
- OpenID ConnectのプロバイダーとしてKeycloakを使う
- OpenID ConnectのクライアントとしてWildFly Elytron OpenID Connectサブシステムを使用した、Jakarta EE 8アプリケーションを使用する
- アプリケーションはJAX-RSで作成し、以下の3つのエンドポイントを作成する
- 認証なしでアクセスできるエンドポイント
- ユーザーがロール
my-roleを保持している場合にアクセスできるエンドポイント - ユーザーがロール
test-roleを保持している場合にアクセスできるエンドポイント
- 各ロールを保持したユーザーをKeycloak上に作成する
環境
今回の環境は、こちら。
$ java --version
openjdk 17.0.4 2022-07-19
OpenJDK Runtime Environment (build 17.0.4+8-Ubuntu-120.04)
OpenJDK 64-Bit Server VM (build 17.0.4+8-Ubuntu-120.04, mixed mode, sharing)


$ mvn --version
Apache Maven 3.8.6 (84538c9988a25aec085021c365c560670ad80f63)
Maven home: $HOME/.sdkman/candidates/maven/current
Java version: 17.0.4, vendor: Private Build, runtime: /usr/lib/jvm/java-17-openjdk-amd64
Default locale: ja_JP, platform encoding: UTF-8
OS name: "linux", version: "5.4.0-126-generic", arch: "amd64", family: "unix"
WildFlyは26.1.2.Finalを使用します。
$ curl -LO https://github.com/wildfly/wildfly/releases/download/26.1.2.Final/wildfly-26.1.2.Final.zip
$ unzip wildfly-26.1.2.Final.zip
$ cd wildfly-26.1.2.Final
Keycloakは19.0.2を使用し、172.17.0.2で動作しているものとします。
$ bin/kc.sh --version
Keycloak 19.0.2
JVM: 17.0.4.1 (Eclipse Adoptium OpenJDK 64-Bit Server VM 17.0.4.1+1)
OS: Linux 5.4.0-126-generic amd64
Keycloakの管理ユーザーは、起動時に作成しておきます。
$ KEYCLOAK_ADMIN=admin KEYCLOAK_ADMIN_PASSWORD=password bin/kc.sh start-dev
Keycloak側の準備をする
まずは、Keycloak側の準備をしていきましょう。
管理CLIでログイン。
$ bin/kcadm.sh config credentials --server http://localhost:8080 --realm master --user admin --password password
Realmの作成。Realmの名前は、sample-realmとしました。
$ bin/kcadm.sh create realms -s realm=sample-realm -s enabled=true
クライアントの作成。クライアント名は、wildfly-elytron-oidc-clientとします。
$ bin/kcadm.sh create clients -r sample-realm -s clientId=wildfly-elytron-oidc-client -s enabled=true
クライアントIDを取得して
$ CLIENT_ID=$(bin/kcadm.sh get clients -r sample-realm -q 'clientId=wildfly-elytron-oidc-client' -F id | jq -r '.[].id')
rootUrlおよびredirectUrisの更新と、クライアントシークレットの取得を行います。
$ bin/kcadm.sh update clients/${CLIENT_ID} -r sample-realm -s rootUrl=http://localhost:8080 -s 'redirectUris=["http://localhost:8080/*"]'
$ bin/kcadm.sh get clients/${CLIENT_ID}/client-secret -r sample-realm
redirectUrisはピンポイントで指定した方が良いかなと思ったのですが、実際に動作確認してみるとクライアント側で認証が必要なページに
アクセスした際のURLに戻ろうとするみたいなので、ワイルドカード(*)は使わないといけなさそうですね。
ユーザーとロールの作成。
## my-roleロールの作成
$ bin/kcadm.sh create roles -r sample-realm -s name=my-role

## my-userユーザーの作成
$ bin/kcadm.sh create users -r sample-realm -s username=my-user -s enabled=true
$ bin/kcadm.sh set-password -r sample-realm --username my-user --new-password password

## my-userユーザーにmy-userロールの紐付け
$ bin/kcadm.sh add-roles -r sample-realm --uusername my-user --rolename my-role


## test-roleロールの作成
$ bin/kcadm.sh create roles -r sample-realm -s name=test-role

## test-userユーザーの作成
$ bin/kcadm.sh create users -r sample-realm -s username=test-user -s enabled=true
$ bin/kcadm.sh set-password -r sample-realm --username test-user --new-password password

## test-userユーザーにtest-userロールの紐付け
$ bin/kcadm.sh add-roles -r sample-realm --uusername test-user --rolename test-role
これで、Keycloak側の準備は完了です。
WildFlyの準備
WildFlyの準備は、特にすることはありません。起動するだけです。
$ bin/standalone.sh
elytron-oidc-client Extensionおよびelytron-oidc-clientサブシステムが有効になっていない場合は、追加する必要があるようなのですが。
$ bin/jboss-cli.sh -c
[standalone@localhost:9990 /] /extension=org.wildfly.extension.elytron-oidc-client:add
[standalone@localhost:9990 /] /subsystem=elytron-oidc-client:add
[standalone@localhost:9990 /] reload
WildFly 26.1.2.Finalでは、standalone-load-balancer.xml以外にはすべて含まれていそうなので特に追加の作業は不要ですね。
$ grep -E elytron-oidc-client standalone/configuration/*.xml
standalone/configuration/standalone-full-ha.xml:        <extension module="org.wildfly.extension.elytron-oidc-client"/>
standalone/configuration/standalone-full-ha.xml:        <subsystem xmlns="urn:wildfly:elytron-oidc-client:1.0"/>
standalone/configuration/standalone-full.xml:        <extension module="org.wildfly.extension.elytron-oidc-client"/>
standalone/configuration/standalone-full.xml:        <subsystem xmlns="urn:wildfly:elytron-oidc-client:1.0"/>
standalone/configuration/standalone-ha.xml:        <extension module="org.wildfly.extension.elytron-oidc-client"/>
standalone/configuration/standalone-ha.xml:        <subsystem xmlns="urn:wildfly:elytron-oidc-client:1.0"/>
standalone/configuration/standalone-microprofile-ha.xml:        <extension module="org.wildfly.extension.elytron-oidc-client"/>
standalone/configuration/standalone-microprofile-ha.xml:        <subsystem xmlns="urn:wildfly:elytron-oidc-client:1.0"/>
standalone/configuration/standalone-microprofile.xml:        <extension module="org.wildfly.extension.elytron-oidc-client"/>
standalone/configuration/standalone-microprofile.xml:        <subsystem xmlns="urn:wildfly:elytron-oidc-client:1.0"/>
standalone/configuration/standalone.xml:        <extension module="org.wildfly.extension.elytron-oidc-client"/>
standalone/configuration/standalone.xml:        <subsystem xmlns="urn:wildfly:elytron-oidc-client:1.0"/>
elytron-oidc-client Extensionおよびelytron-oidc-clientサブシステムを追加しようとすると、むしろエラーになります。
アプリケーションを作成する
では、アプリケーションを作成していきます。
Mavenの設定の大半は、こんな感じで。
    <groupId>org.littlewings</groupId>
    <artifactId>wildfly-elytron-oidc-example</artifactId>
    <version>0.0.1-SNAPSHOT</version>
    <packaging>war</packaging>

    <properties>
        <maven.compiler.source>17</maven.compiler.source>
        <maven.compiler.target>17</maven.compiler.target>
        <project.build.sourceEncoding>UTF-8</project.build.sourceEncoding>
        <project.reporting.outputEncoding>UTF-8</project.reporting.outputEncoding>
    </properties>

    <dependencyManagement>
        <dependencies>
            <dependency>
                <groupId>jakarta.platform</groupId>
                <artifactId>jakarta.jakartaee-bom</artifactId>
                <version>8.0.0</version>
                <type>pom</type>
                <scope>import</scope>
            </dependency>
        </dependencies>
    </dependencyManagement>

    <dependencies>
        <dependency>
            <groupId>jakarta.ws.rs</groupId>
            <artifactId>jakarta.ws.rs-api</artifactId>
            <scope>provided</scope>
        </dependency>
    </dependencies>

    <build>
        <finalName>ROOT</finalName>
        <plugins>
            <plugin>
                <groupId>org.apache.maven.plugins</groupId>
                <artifactId>maven-war-plugin</artifactId>
                <version>3.3.2</version>
            </plugin>
        </plugins>
    </build>
利用するJakarta EE 8の仕様は、JAX-RSのみとします。
JAX-RSリソースクラス。
src/main/java/org/littlewings/wildfly/elytron/oidc/SampleResource.java
package org.littlewings.wildfly.elytron.oidc;

import java.security.Principal;
import javax.ws.rs.GET;
import javax.ws.rs.Path;
import javax.ws.rs.Produces;
import javax.ws.rs.core.Context;
import javax.ws.rs.core.MediaType;
import javax.ws.rs.core.SecurityContext;

@Path("/")
public class SampleResource {
    @GET
    @Path("hello")
    @Produces(MediaType.TEXT_PLAIN)
    public String hello() {
        return "Hello WildFly Elytron OIDC Application!!";
    }

    @GET
    @Path("my-role/principal-name")
    @Produces(MediaType.TEXT_PLAIN)
    public String principal(@Context SecurityContext securityContext) {
        Principal principal = securityContext.getUserPrincipal();

        return principal.getName();
    }

    @GET
    @Path("test-role/message")
    @Produces(MediaType.TEXT_PLAIN)
    public String message() {
        return "Authenticated!!";
    }
}
上から順に、以下の想定で作成しています。
- 認証なしでアクセスできるエンドポイント
- ユーザーがロール
my-roleを保持している場合にアクセスできるエンドポイント - ユーザーがロール
test-roleを保持している場合にアクセスできるエンドポイント
src/main/java/org/littlewings/wildfly/elytron/oidc/JaxrsActivator.java
JAX-RSの有効化。
package org.littlewings.wildfly.elytron.oidc;

import javax.ws.rs.ApplicationPath;
import javax.ws.rs.core.Application;

@ApplicationPath("")
public class JaxrsActivator extends Application {
}
次に、こちらに沿って設定をしていきます。
web.xml。
src/main/webapp/WEB-INF/web.xml
<?xml version="1.0" encoding="UTF-8"?>
<web-app xmlns="http://xmlns.jcp.org/xml/ns/javaee"
         xmlns:xsi="http://www.w3.org/2001/XMLSchema-instance"
         xsi:schemaLocation="http://xmlns.jcp.org/xml/ns/javaee webapp_4_0.xsd"
         version="4.0">

    <security-constraint>
        <web-resource-collection>
            <web-resource-name>my-role resource collection</web-resource-name>
            <url-pattern>/my-role/*</url-pattern>
        </web-resource-collection>
        <auth-constraint>
            <role-name>my-role</role-name>
        </auth-constraint>
    </security-constraint>

    <security-constraint>
        <web-resource-collection>
            <web-resource-name>test-role resource collection</web-resource-name>
            <url-pattern>/test-role/*</url-pattern>
        </web-resource-collection>
        <auth-constraint>
            <role-name>test-role</role-name>
        </auth-constraint>
    </security-constraint>

    <login-config>
        <auth-method>OIDC</auth-method>
    </login-config>

    <security-role>
        <role-name>my-role</role-name>
    </security-role>
    <security-role>
        <role-name>test-role</role-name>
    </security-role>

</web-app>
ポイントは、login-config/auth-methodをOIDCに指定することですね。
    <login-config>
        <auth-method>OIDC</auth-method>
    </login-config>
The second step is to set the auth-method to OIDC in the application’s web.xml file.
それから、WEB-INFディレクトリ内にoidc.jsonというファイルを作成する必要があります。
The first step is to create an oidc.json configuration file in the WEB-INF directory of the application.
今回は、こんな感じで作成。
src/main/webapp/WEB-INF/oidc.json
{
    "client-id" : "wildfly-elytron-oidc-client",
    "credentials" : {
     "secret" : "Hl2DNvp4hCw9gzaQs7KdX6B7zIzhRPjk"
    },
    "provider-url" : "http://172.17.0.2:8080/realms/sample-realm",
    "principal-attribute" : "preferred_username",
    "ssl-required" : "external"
}
今回は、これくらいの内容で良さそうです。
provider-urlについてはちょっと注意が必要で、WildFly Elytronのブログエントリーには以下のように書かれています。
provider-url - The URL of the OpenID provider. WildFly will use provider-url/.well-known/configuration to discover more information about the OpenID provider. As an example, for Keycloak, the provider-url will look like http://localhost:8080/auth/realms/myrealm.
現在のKeycloakではURLのパスが変わっており、http://localhost:8080/auth/realms/myrealmからhttp://localhost:8080/realms/myrealmのように
なります(/authがなくなった)。
oidc.jsonのサンプルは、こちらに記載があります。
こちらを見ると、値に環境変数も使えそうな感じがしますね。
{
    "client-id" : "myclient",
    "provider-url" : "${env.OIDC_PROVIDER_URL:http://localhost:8080}/auth/realms/myrealm",
    "public-client" : "true",
    "principal-attribute" : "preferred_username",
    "ssl-required" : "EXTERNAL"
}
なお、これらの設定はoidc.jsonとしてアプリケーション内に含める以外にも、elytron-oidc-clientサブシステムに対して行うことも
できるみたいです。
とりあえず、ここまでで準備は完了です。
動作確認してみる
では、動作確認してみましょう。
パッケージングして
$ mvn package
WildFlyにデプロイ。
$ cp target/ROOT.war /path/to/wildfly-26.1.2.Final/standalone/deployments
http://localhost:8080/helloにアクセス。

こちらは、ログインせずにアクセスできます。
http://localhost:8080/my-role/principal-nameにアクセスすると、Keycloakにリダイレクトされるのでmy-userユーザーでログイン。

ログイン後、ユーザー名が表示されます。

エンドポイントの定義は、こちらでした。
    @GET
    @Path("my-role/principal-name")
    @Produces(MediaType.TEXT_PLAIN)
    public String principal(@Context SecurityContext securityContext) {
        Principal principal = securityContext.getUserPrincipal();

        return principal.getName();
    }
一方で、http://localhost:8080/test-role/messageにアクセスすると、my-userユーザーはtest-roleロールを保持していないので403になります。

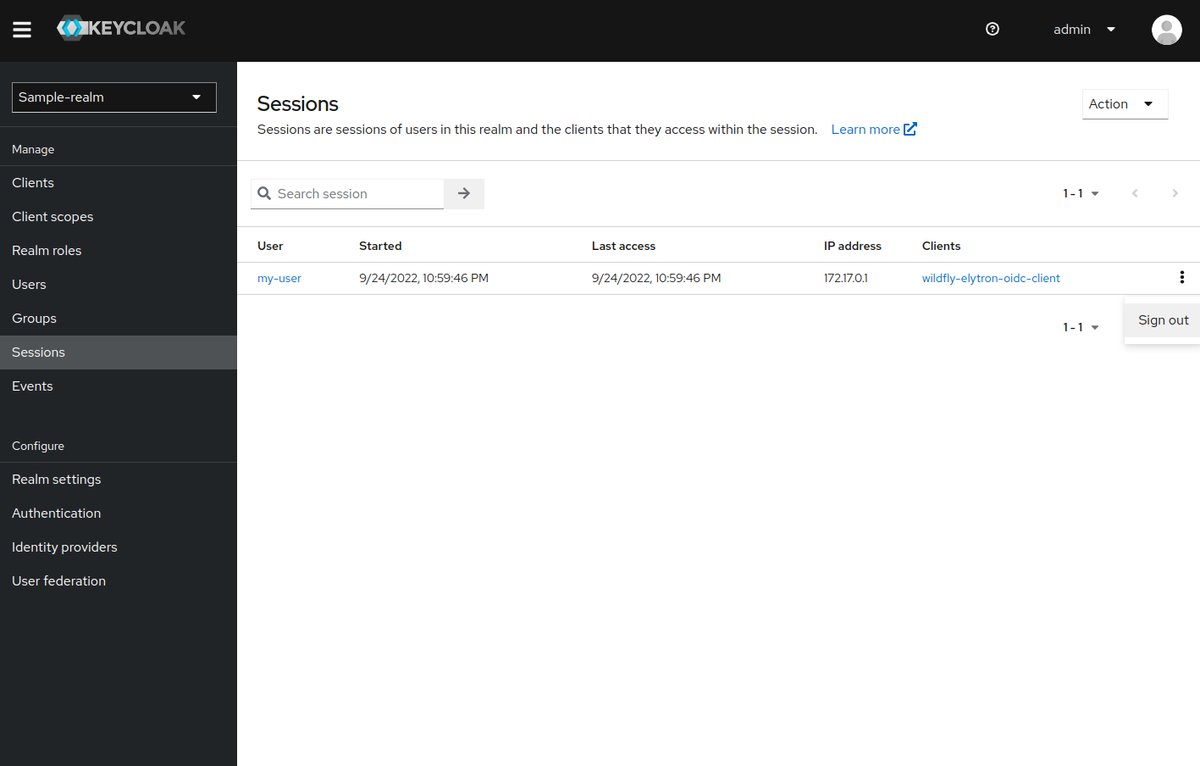
ここまではOKですね。ここで1度ブラウザからCookieを削除し、Keycloakのセッションからmy-userをログアウトさせます。
再度http://localhost:8080/test-role/messageにアクセスして、今度はtest-userでKeycloakにログイン。

今度はアクセスできるようになります。

代わりに、http://localhost:8080/my-role/principal-nameにアクセスすると今度はこちらが403になります。

うまく動いているようですね。
認証していることのみを制約にする
今回、特定のロールとweb-resource-collectionを紐付けて定義しましたが、単に認証済みであることだけを求めるのであればweb.xmlを
以下のように変更します。
src/main/webapp/WEB-INF/web.xml
<?xml version="1.0" encoding="UTF-8"?>
<web-app xmlns="http://xmlns.jcp.org/xml/ns/javaee"
         xmlns:xsi="http://www.w3.org/2001/XMLSchema-instance"
         xsi:schemaLocation="http://xmlns.jcp.org/xml/ns/javaee webapp_4_0.xsd"
         version="4.0">

    <security-constraint>
        <web-resource-collection>
            <web-resource-name>my-role resource collection</web-resource-name>
            <url-pattern>/my-role/*</url-pattern>
        </web-resource-collection>
        <!--
        <auth-constraint>
            <role-name>my-role</role-name>
        </auth-constraint>
        -->
        <auth-constraint>
            <role-name>*</role-name>
        </auth-constraint>
    </security-constraint>

    <security-constraint>
        <web-resource-collection>
            <web-resource-name>test-role resource collection</web-resource-name>
            <url-pattern>/test-role/*</url-pattern>
        </web-resource-collection>
        <!--
        <auth-constraint>
            <role-name>test-role</role-name>
        </auth-constraint>
        -->
        <auth-constraint>
            <role-name>*</role-name>
        </auth-constraint>
    </security-constraint>

    <login-config>
        <auth-method>OIDC</auth-method>
    </login-config>

    <!--
    <security-role>
        <role-name>my-role</role-name>
    </security-role>
    <security-role>
        <role-name>test-role</role-name>
    </security-role>
    -->
    <security-role>
        <role-name>*</role-name>
    </security-role>

</web-app>
auth-constraintとsecurity-roleのrole-nameを*にします。
        <auth-constraint>
            <role-name>*</role-name>
        </auth-constraint>

〜省略〜

    <security-role>
        <role-name>*</role-name>
    </security-role>
Principalの実体とロールの取得元
今回、Principalの内容をそのまま返すのではなく、nameのみに絞りました。
    @GET
    @Path("my-role/principal-name")
    @Produces(MediaType.TEXT_PLAIN)
    public String principal(@Context SecurityContext securityContext) {
        Principal principal = securityContext.getUserPrincipal();

        return principal.getName();
    }
PrincipalをそのままJSONにしようとすると、シリアライズで失敗したからなのですが。
このPrincipalの実体は、OidcPrincipalクラスになります。
その中身は、アクセストークンとIDトークンを保持したOidcSecurityContextクラスです。
ところで、ロールの情報はなにを見ているのでしょう?
答えは、アクセストークンのようです。
realm_access内のrolesを見ているのですが、Keycloak固有になるんでしょうか?
オマケ: WildFly Bootable JARでWildFly Elytron OpenID Connect Clientサブシステムを使用する
最後に、WildFly Bootable JARでElytron OpenID Connect Clientサブシステムを使ってみましょう。
といっても、プラグイン設定の話ですが。
こんな感じで、レイヤーにelytron-oidc-clientを追加すればOKです。
                    <plugin>
                        <groupId>org.wildfly.plugins</groupId>
                        <artifactId>wildfly-jar-maven-plugin</artifactId>
                        <version>8.0.0.Final</version>
                        <configuration>
                            <feature-pack-location>wildfly@maven(org.jboss.universe:community-universe)#26.1.2.Final</feature-pack-location>
                            <layers>
                                <layer>jaxrs-server</layer>
                                <layer>elytron-oidc-client</layer>
                                <layer>management</layer>
                            </layers>
                            <!--
                            <plugin-options>
                                <jboss-maven-dist/>
                            </plugin-options>
                            -->
                        </configuration>
                        <executions>
                            <execution>
                                <goals>
                                    <goal>package</goal>
                                </goals>
                            </execution>
                        </executions>
                    </plugin>
今回は、こんな感じにWildFly Bootable JAR用にプロファイルを別にして作成。
    <profiles>
        <profile>
            <id>default</id>
            <activation>
                <activeByDefault>true</activeByDefault>
            </activation>
            <build>
                <finalName>ROOT</finalName>
            </build>
        </profile>
        <profile>
            <id>bootable</id>
            <build>
                <plugins>
                    <plugin>
                        <groupId>org.wildfly.plugins</groupId>
                        <artifactId>wildfly-jar-maven-plugin</artifactId>
                        <version>8.0.0.Final</version>
                        <configuration>
                            <feature-pack-location>wildfly@maven(org.jboss.universe:community-universe)#26.1.2.Final</feature-pack-location>
                            <layers>
                                <layer>jaxrs-server</layer>
                                <layer>elytron-oidc-client</layer>
                                <layer>management</layer>
                            </layers>
                            <!--
                            <plugin-options>
                                <jboss-maven-dist/>
                            </plugin-options>
                            -->
                        </configuration>
                        <executions>
                            <execution>
                                <goals>
                                    <goal>package</goal>
                                </goals>
                            </execution>
                        </executions>
                    </plugin>
                </plugins>
            </build>
        </profile>
    </profiles>
パッケージング。
$ mvn -Pbootable package
これで、WildFly Bootable JARで先ほどの確認と同じことができるようになります。
$ java -jar target/wildfly-elytron-oidc-example-0.0.1-SNAPSHOT-bootable.jar
ところで、elytron-oidc-clientというレイヤーは、Galleon Provisioningガイドの「Foundational Galleon layers」にも「Basic Galleon Layers」にも
記載がありません。
Galleon Provisioning Guide / Provisioning WildFly with Galleon / WildFly Galleon layers
独立してレイヤー定義があるようです。
まとめ
KeycloakとWildFlyのElytron OpenID Connect Clientサブシステムを使って、OpenID Connectを使ってみました。
WildFly Elytronについてまったく知らなかったので、いい機会にはなりました。
ただ、web.xmlへのセキュリティ設定の書き方はほぼ覚えていなかったので、ここでちょっと手間取りましたが…。
情報を調べる以外は特に苦労せずすんなりできたので、まあ良しとしましょう。