これは、なにをしたくて書いたもの?
ちょっとFilebeatを試してみようかなと。
まだ感覚がわからないので、まずは手始めにApacheのログを取り込むようにしてみたいと思います。
環境
今回の環境は、こちら。
$ lsb_release -a
No LSB modules are available.
Distributor ID: Ubuntu
Description:    Ubuntu 18.04.3 LTS
Release:    18.04
Codename:   bionic
Ubuntu Linux 18.04 LTSに、Filebeat、Elasticsearch、Kibanaをそれぞれインストールします。
IPアドレスは、以下とします。
- Filebeat … 192.168.33.11
- Elasticsearch … 192.168.33.12
- Kibana … 192.168.33.13
バージョンについては、こちら。
## Filebeat
$ filebeat version
filebeat version 7.4.2 (amd64), libbeat 7.4.2 [15075156388b44390301f070960fd8aeac1c9712 built 2019-10-28 19:16:36 +0000 UTC]


## Elasticsearch
$ curl 192.168.33.12:9200?pretty
{
  "name" : "ubuntu1804.localdomain",
  "cluster_name" : "elasticsearch",
  "cluster_uuid" : "-FvI_J6ZROi2EomLWhYU3g",
  "version" : {
    "number" : "7.4.2",
    "build_flavor" : "oss",
    "build_type" : "deb",
    "build_hash" : "2f90bbf7b93631e52bafb59b3b049cb44ec25e96",
    "build_date" : "2019-10-28T20:40:44.881551Z",
    "build_snapshot" : false,
    "lucene_version" : "8.2.0",
    "minimum_wire_compatibility_version" : "6.8.0",
    "minimum_index_compatibility_version" : "6.0.0-beta1"
  },
  "tagline" : "You Know, for Search"
}
Kibana。

お題としては、Filebeatが動作するサーバーにApacheをインストールして、アクセスログが取り込まれるところを見てみましょう。
ログを出すために参照するドキュメント(Webコンテンツ)は、Apache自身のドキュメントとします。
Filebeatをインストールする
まずは、ドキュメントを見ながらFilebeatをインストール。
Repositories for APT and YUM | Filebeat Reference [7.4] | Elastic
$ wget -qO - https://artifacts.elastic.co/GPG-KEY-elasticsearch | sudo apt-key add -
$ echo "deb https://artifacts.elastic.co/packages/oss-7.x/apt stable main" | sudo tee -a /etc/apt/sources.list.d/elastic-7.x.list
$ sudo apt -y update
$ sudo apt -y install filebeat

$ sudo systemctl enable filebeat
Apacheもインストールして、動作確認に使うHTMLを置きます。
$ sudo apt install -y apache2
$ cd /var/www/html
$ sudo curl -O https://www-eu.apache.org/dist//httpd/docs/httpd-docs-2.4.33.ja.zip
$ sudo unzip httpd-docs-2.4.33.ja.zip
$ sudo mv httpd-docs-2.4.33.ja/* ./.
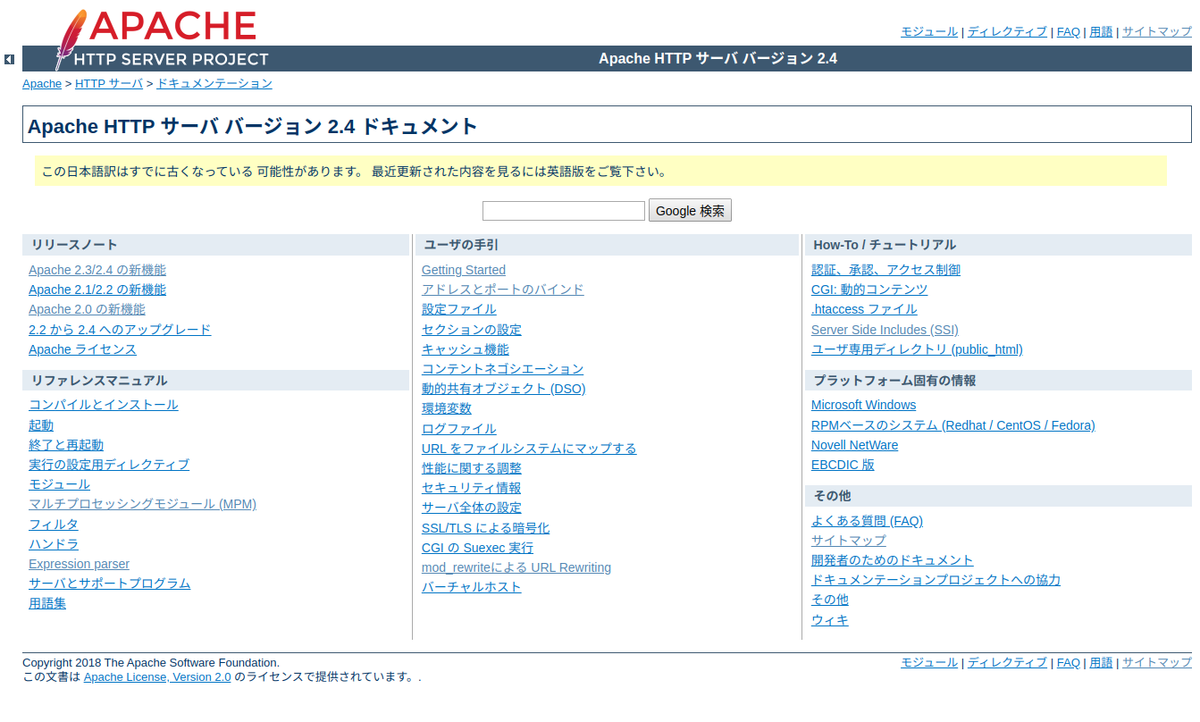
表示すると、こんな感じですね。

FilebeatのApacheモジュールを有効にする
続いては、FilebeatのApacheモジュールを有効にしてみましょう。
Apache module | Filebeat Reference [7.4] | Elastic
まずは、Filebeatに含まれているモジュールの一覧を見てみます。
$ sudo filebeat modules list
Enabled:

Disabled:
apache
auditd
elasticsearch
haproxy
icinga
iis
kafka
kibana
logstash
mongodb
mysql
nats
nginx
osquery
postgresql
redis
santa
system
traefik
これだけあるようです。まだどれも有効ではありませんね。
ドキュメントに沿って、Apacheモジュールを有効にしてみます。
$ sudo filebeat modules enable apache
Enabled apache
これは、「/etc/filebeat/modules.d」ディレクトリ内のファイルをリネームすることによって実現されています。
$ ll /etc/filebeat/modules.d
total 84
drwxr-xr-x 2 root root 4096 Dec  1 02:44 ./
drwxr-xr-x 3 root root 4096 Dec  1 02:34 ../
-rw-r--r-- 1 root root  475 Oct 28 19:16 apache.yml
-rw-r--r-- 1 root root  280 Oct 28 19:16 auditd.yml.disabled
-rw-r--r-- 1 root root  964 Oct 28 19:16 elasticsearch.yml.disabled
-rw-r--r-- 1 root root  376 Oct 28 19:16 haproxy.yml.disabled
-rw-r--r-- 1 root root  651 Oct 28 19:16 icinga.yml.disabled
-rw-r--r-- 1 root root  470 Oct 28 19:16 iis.yml.disabled
-rw-r--r-- 1 root root  398 Oct 28 19:16 kafka.yml.disabled
-rw-r--r-- 1 root root  293 Oct 28 19:16 kibana.yml.disabled
-rw-r--r-- 1 root root  470 Oct 28 19:16 logstash.yml.disabled
-rw-r--r-- 1 root root  296 Oct 28 19:16 mongodb.yml.disabled
-rw-r--r-- 1 root root  471 Oct 28 19:16 mysql.yml.disabled
-rw-r--r-- 1 root root  287 Oct 28 19:16 nats.yml.disabled
-rw-r--r-- 1 root root  472 Oct 28 19:16 nginx.yml.disabled
-rw-r--r-- 1 root root  495 Oct 28 19:16 osquery.yml.disabled
-rw-r--r-- 1 root root  305 Oct 28 19:16 postgresql.yml.disabled
-rw-r--r-- 1 root root  566 Oct 28 19:16 redis.yml.disabled
-rw-r--r-- 1 root root  266 Oct 28 19:16 santa.yml.disabled
-rw-r--r-- 1 root root  477 Oct 28 19:16 system.yml.disabled
-rw-r--r-- 1 root root  302 Oct 28 19:16 traefik.yml.disabled
後述する、filebeat.ymlのこの部分ですね。
#============================= Filebeat modules ===============================

filebeat.config.modules:
  # Glob pattern for configuration loading
  path: ${path.config}/modules.d/*.yml

  # Set to true to enable config reloading
  reload.enabled: false

  # Period on which files under path should be checked for changes
  #reload.period: 10s
コメントアウトされている項目を見ると、リロードもできそうな感じが。
それはそうと、Apacheモジュールが有効になりました。
$ sudo filebeat modules list
Enabled:
apache

Disabled:
auditd
elasticsearch
haproxy
icinga
iis
kafka
kibana
logstash
mongodb
mysql
nats
nginx
osquery
postgresql
redis
santa
system
traefik
続いて、Filebeatの設定をします。今回は、以下のようにしました。
$ sudo grep -vE '^ *#|^$' /etc/filebeat/filebeat.yml
filebeat.inputs:
- type: log
  enabled: false
  paths:
    - /var/log/*.log
filebeat.config.modules:
  path: ${path.config}/modules.d/*.yml
  reload.enabled: false
setup.template.settings:
  index.number_of_shards: 1
setup.kibana:
  host: "192.168.33.13:5601"
output.elasticsearch:
  hosts: ["192.168.33.12:9200"]
processors:
  - add_host_metadata: ~
  - add_cloud_metadata: ~
変更したのは、ElasticsearchとKibanaのアクセス先です。
setup.kibana:
  host: "192.168.33.13:5601"
output.elasticsearch:
  hosts: ["192.168.33.12:9200"]
セットアップします。
$ sudo filebeat setup -e
「-e」は、結果を標準出力に書き出すオプションです。
実行すると、Kibanaにダッシュボードが追加されます。

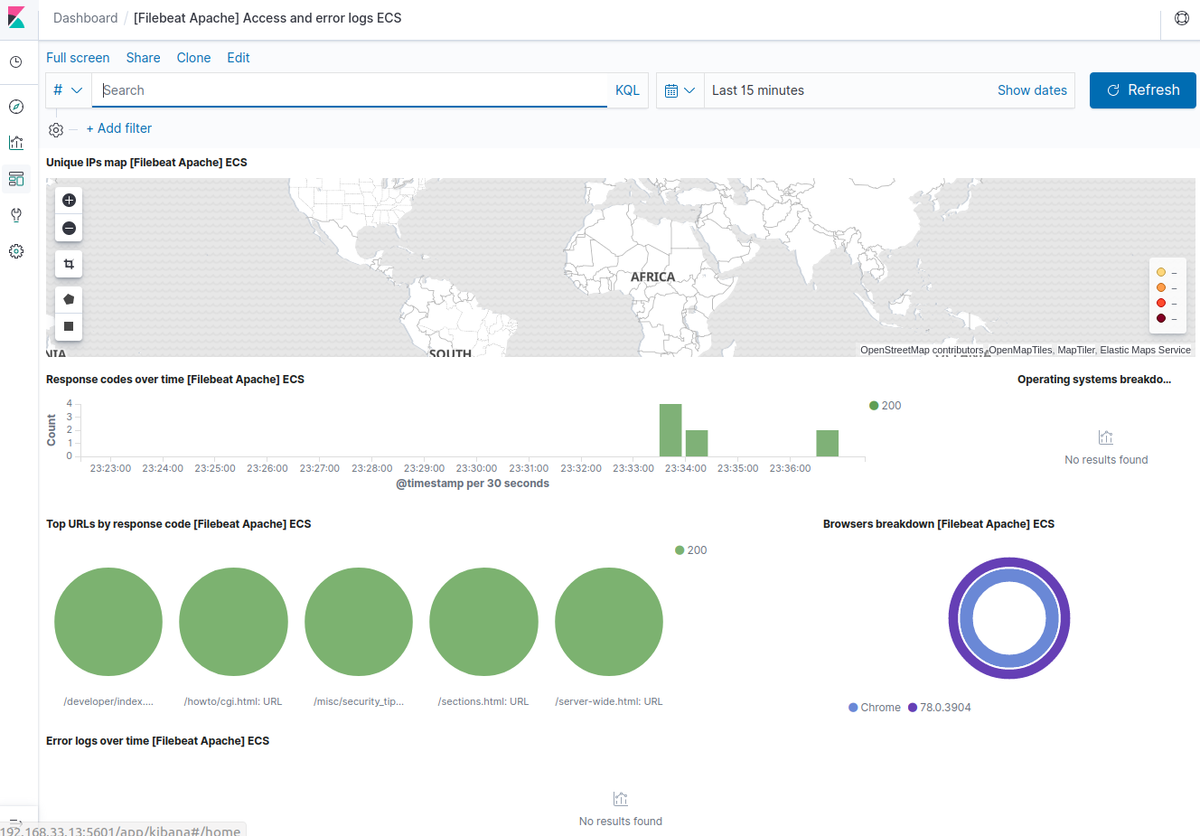
Apacheモジュールに関するものは、こちら。

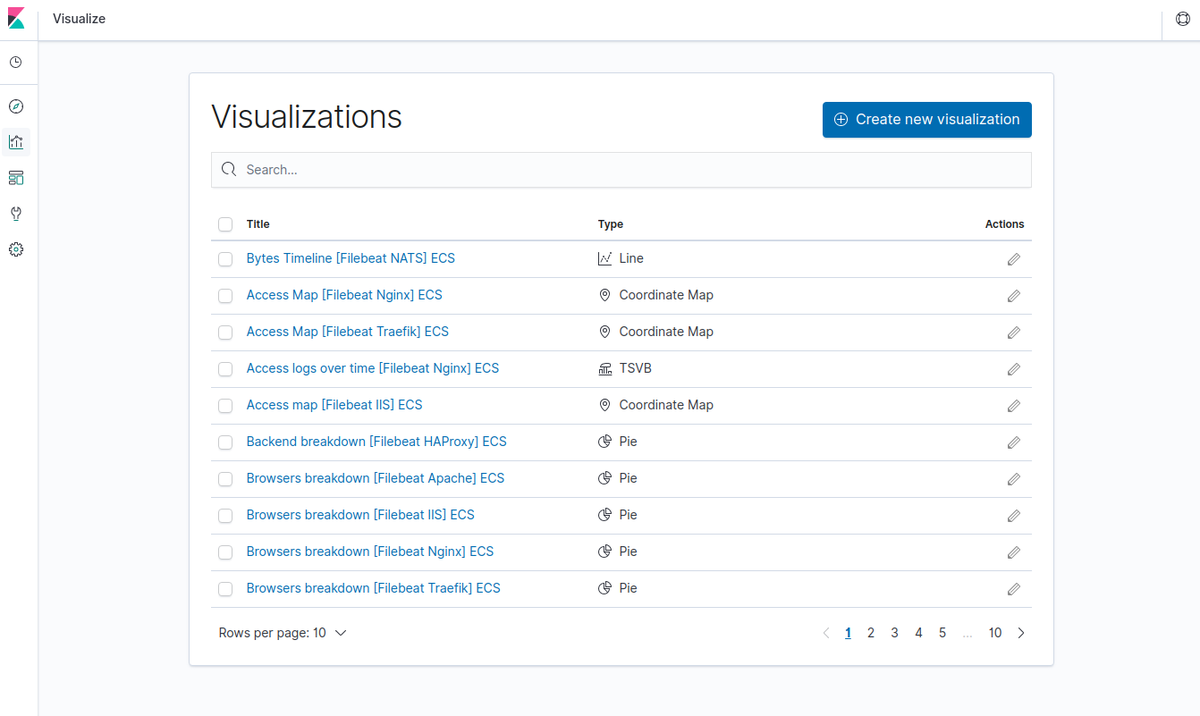
Visualizationも増えています。


Index Patternもできていたり。

では、Filebeatを起動。
$ sudo systemctl start filebeat
あとは、適当にブラウザでApacheにアクセスしていると、アクセスログなどを読み取っていることがDiscoverから確認できます。

ダッシュボード。

OKそうですね。けっこう簡単に導入できました。
ファイルをどこまで読んだのか?
ところで、Filebeatはファイルをどこまで読んだのかといった情報を、どこに保存しているのでしょう?
レジストリ、というのが正しそうです。
確認。
$ sudo cat /var/lib/filebeat/registry/filebeat/data.json | python3 -m json.tool
[
    {
        "source": "/var/log/apache2/access.log",
        "offset": 3211,
        "timestamp": "2019-12-02T14:36:40.711427719Z",
        "ttl": -1,
        "type": "log",
        "meta": null,
        "FileStateOS": {
            "inode": 1452587,
            "device": 2051
        }
    },
    {
        "source": "/var/log/apache2/other_vhosts_access.log",
        "offset": 0,
        "timestamp": "2019-12-02T14:34:41.800320565Z",
        "ttl": -1,
        "type": "log",
        "meta": null,
        "FileStateOS": {
            "inode": 1452588,
            "device": 2051
        }
    },
    {
        "source": "/var/log/apache2/error.log",
        "offset": 279,
        "timestamp": "2019-12-02T14:34:46.638664292Z",
        "ttl": -1,
        "type": "log",
        "meta": null,
        "FileStateOS": {
            "inode": 1452586,
            "device": 2051
        }
    }
]
なるほど。
そういえば、なにも考えずにApacheのアクセスログファイルを読めてますが、Filebeatはどのユーザーで動作しているかというと
$ ps -ef | grep filebeat
root     15290     1  0 14:34 ?        00:00:00 /usr/share/filebeat/bin/filebeat -e -c /etc/filebeat/filebeat.yml -path.home /usr/share/filebeat -path.config /etc/filebeat -path.data /var/lib/filebeat -path.logs /var/log/filebeat
xxxxx  15363  2900  0 14:44 pts/0    00:00:00 grep --color=auto filebeat
rootですね、と。
Apacheのログファイルの場所を変えてみる
ところで、Apacheのログファイルは、どこから読むようになっているのでしょう。
Apacheモジュール定義を見てみます。
/usr/share/filebeat/module/apache/access/manifest.yml
module_version: 1.0

var:
  - name: paths
    default:
      - /var/log/apache2/access.log*
      - /var/log/apache2/other_vhosts_access.log*
      - /var/log/httpd/access_log*
    os.darwin:
      - /usr/local/var/log/apache2/access_log*
    os.windows:
      - "C:/tools/Apache/httpd-2.*/Apache24/logs/access.log*"
      - "C:/Program Files/Apache Software Foundation/Apache2.*/logs/access.log*"

ingest_pipeline: ingest/default.json
input: config/access.yml

requires.processors:
- name: user_agent
  plugin: ingest-user-agent
- name: geoip
  plugin: ingest-geoip
/usr/share/filebeat/module/apache/error/manifest.yml
module_version: 1.0

var:
  - name: paths
    default:
      - /var/log/apache2/error.log*
      - /var/log/httpd/error_log*
    os.darwin:
      - /usr/local/var/log/apache2/error_log*
    os.windows:
      - "C:/tools/Apache/httpd-2.*/Apache24/logs/error.log*"
      - "C:/Program Files/Apache Software Foundation/Apache2.*/logs/error.log*"

ingest_pipeline: ingest/pipeline.json
input: config/error.yml
「var.paths」を見ると、およそわかりますね。
これは、ドキュメントの以下の部分を見ると、オリジナルの設定ファイルを触らずともカスタマイズできそうです。
Apache module / Configure the module
「/etc/filebeat/modules.d」ディレクトリ配下のファイルを触ればよい、と。
とりあえず、現状を確認してみます。
$ grep -v '^ *#' /etc/filebeat/modules.d/apache.yml

- module: apache
  access:
    enabled: true


  error:
    enabled: true
ほぼなにも入っていません。
ここで、Apacheのアクセスログの出力場所を、「/var/log/web」に変更してみます。
$ sudo mkdir /var/log/web
$ sudo chown root.adm /var/log/web
/etc/apache2/envvarsは、以下のように変更。
export APACHE_LOG_DIR=/var/log/web$SUFFIX
反映。
$ sudo systemctl restart apache2
当然のことながら、ログファイルを読めなくなるので「/etc/filebeat/modules.d/apache.yml 」を変更します。
$ grep -v '^ *#' /etc/filebeat/modules.d/apache.yml

- module: apache
  access:
    enabled: true

    var.paths:
     - /var/log/web/access.log*

  error:
    enabled: true

    var.paths:
     - /var/log/web/error.log*
Filebeatを再起動。
$ sudo systemctl restart filebeat
これで、変更したディレクトリにあるログファイルが読めるようになります。
Injest Nodeのパイプライン
ところで、Apacheモジュールのアクセスログ、エラーログを読み込む設定を見てみると、それぞれこんなのが書いてありました。
ingest_pipeline: ingest/default.json

ingest_pipeline: ingest/pipeline.json
中身の一部。
$ cat /usr/share/filebeat/module/apache/access/ingest/default.json
{
    "description": "Pipeline for parsing Apache HTTP Server access logs. Requires the geoip and user_agent plugins.",
    "processors": [
        {
            "grok": {
                "field": "message",
                "patterns": [
                    "%{IPORHOST:source.address} - %{DATA:user.name} \\[%{HTTPDATE:apache.access.time}\\] \"(?:%{WORD:http.request.method} %{DATA:url.original} HTTP/%{NUMBER:http.version}|-)?\" %{NUMBER:http.response.status_code:long} (?:%{NUMBER:http.response.body.bytes:long}|-)( \"%{DATA:http.request.referrer}\")?( \"%{DATA:user_agent.original}\")?",
                    "%{IPORHOST:source.address} - %{DATA:user.name} \\[%{HTTPDATE:apache.access.time}\\] \"-\" %{NUMBER:http.response.status_code:long} -",
                    "\\[%{HTTPDATE:apache.access.time}\\] %{IPORHOST:source.address} %{DATA:apache.access.ssl.protocol} %{DATA:apache.access.ssl.cipher} \"%{WORD:http.request.method} %{DATA:url.original} HTTP/%{NUMBER:http.version}\" %{NUMBER:http.response.body.bytes:long}"
                ],
                "ignore_missing": true
            }
        },


〜省略〜

$ catv/usr/share/filebeat/module/apache/error/ingest/pipeline.json
{
    "description": "Pipeline for parsing apache error logs",
    "processors": [
        {
            "grok": {
                "field": "message",
                "patterns": [
                    "\\[%{APACHE_TIME:apache.error.timestamp}\\] \\[%{LOGLEVEL:log.level}\\]( \\[client %{IPORHOST:source.address}(:%{POSINT:source.port})?\\])? %{GREEDYDATA:message}",
                    "\\[%{APACHE_TIME:apache.error.timestamp}\\] \\[%{DATA:apache.error.module}:%{LOGLEVEL:log.level}\\] \\[pid %{NUMBER:process.pid:long}(:tid %{NUMBER:process.thread.id:long})?\\]( \\[client %{IPORHOST:source.address}(:%{POSINT:source.port})?\\])? %{GREEDYDATA:message}"
                ],
                "pattern_definitions": {
                    "APACHE_TIME": "%{DAY} %{MONTH} %{MONTHDAY} %{TIME} %{YEAR}"
                },
                "ignore_missing": true
            }
        },

〜省略〜
これは、ElasticsearchのInjest Nodeで使うパイプラインのようです。
Elasticsearch側を確認すると、FilebeatのsetupのタイミングでKibanaのダッシュボードなどと一緒に、Elasticsearchにもパイプラインが
登録されるようですね。
$ curl 192.168.33.12:9200/_ingest/pipeline?pretty
{
  "filebeat-7.4.2-apache-error-pipeline" : {
    "description" : "Pipeline for parsing apache error logs",
    "processors" : [
      {
        "grok" : {
          "field" : "message",
          "patterns" : [
            "\\[%{APACHE_TIME:apache.error.timestamp}\\] \\[%{LOGLEVEL:log.level}\\]( \\[client %{IPORHOST:source.address}(:%{POSINT:source.port})?\\])? %{GREEDYDATA:message}",
            "\\[%{APACHE_TIME:apache.error.timestamp}\\] \\[%{DATA:apache.error.module}:%{LOGLEVEL:log.level}\\] \\[pid %{NUMBER:process.pid:long}(:tid %{NUMBER:process.thread.id:long})?\\]( \\[client %{IPORHOST:source.address}(:%{POSINT:source.port})?\\])? %{GREEDYDATA:message}"
          ],
          "pattern_definitions" : {
            "APACHE_TIME" : "%{DAY} %{MONTH} %{MONTHDAY} %{TIME} %{YEAR}"
          },
          "ignore_missing" : true
        }
      },
      {
        "date" : {
          "ignore_failure" : true,
          "field" : "apache.error.timestamp",
          "target_field" : "@timestamp",
          "formats" : [
            "EEE MMM dd H:m:s yyyy",
            "EEE MMM dd H:m:s.SSSSSS yyyy"
          ]
        }
      },

      〜省略〜

      {
        "rename" : {
          "field" : "source.as.organization_name",
          "target_field" : "source.as.organization.name",
          "ignore_missing" : true
        }
      }
    ],
    "on_failure" : [
      {
        "set" : {
          "field" : "error.message",
          "value" : "{{ _ingest.on_failure_message }}"
        }
      }
    ]
  },
  "filebeat-7.4.2-apache-access-default" : {
    "description" : "Pipeline for parsing Apache HTTP Server access logs. Requires the geoip and user_agent plugins.",
    "processors" : [
      {
        "grok" : {
          "patterns" : [
            "%{IPORHOST:source.address} - %{DATA:user.name} \\[%{HTTPDATE:apache.access.time}\\] \"(?:%{WORD:http.request.method} %{DATA:url.original} HTTP/%{NUMBER:http.version}|-)?\" %{NUMBER:http.response.status_code:long} (?:%{NUMBER:http.response.body.bytes:long}|-)( \"%{DATA:http.request.referrer}\")?( \"%{DATA:user_agent.original}\")?",
            "%{IPORHOST:source.address} - %{DATA:user.name} \\[%{HTTPDATE:apache.access.time}\\] \"-\" %{NUMBER:http.response.status_code:long} -",
            "\\[%{HTTPDATE:apache.access.time}\\] %{IPORHOST:source.address} %{DATA:apache.access.ssl.protocol} %{DATA:apache.access.ssl.cipher} \"%{WORD:http.request.method} %{DATA:url.original} HTTP/%{NUMBER:http.version}\" %{NUMBER:http.response.body.bytes:long}"
          ],
          "ignore_missing" : true,
          "field" : "message"
        }
      },
      {
        "remove" : {
          "field" : "message"
        }
      },

      〜省略〜

      {
        "rename" : {
          "field" : "source.as.organization_name",
          "target_field" : "source.as.organization.name",
          "ignore_missing" : true
        }
      }
    ],
    "on_failure" : [
      {
        "set" : {
          "field" : "error.message",
          "value" : "{{ _ingest.on_failure_message }}"
        }
      }
    ]
  }
}
なるほどなぁ、と。
参考)
Filebeat にモジュール機能が追加され、ログ可視化が簡単になりました #elastic #beats | Developers.IO