CLOVER🍀

That was when it all began.

Apache Bench(ab)を試す

Apache BenchというApacheに付属するベンチマークツールですが、名前や使い方はよく見るものの、実際に自分で
使ったことがなかったのでちょっと試してみることにしました。

https://httpd.apache.org/docs/2.4/programs/ab.html

Apache Bench?

ドキュメントの通り、Apache Webサーバーに対するベンチマークツールです。

ab is a tool for benchmarking your Apache Hypertext Transfer Protocol (HTTP) server.

HTTPでの負荷をかけることができる、簡易的なツールのようです。

インストール

Apacheがインストールされている場合、Apache Benchも一緒にインストールされています。

また、Apache自体はインストールせずに、Apache Benchを使いたいという場合は、ユーティリティ的なパッケージを
インストールすることでも導入可能です。

Ubuntu Linuxの場合、以下のコマンドでインストールできます。

$ sudo apt install apache2-utils

今回は、Apache 2.4.29に付属しているApache Benchを使うことにします。

使い方

まずは、ヘルプを。

$ ab -h
Usage: ab [options] [http[s]://]hostname[:port]/path
Options are:
    -n requests     Number of requests to perform
    -c concurrency  Number of multiple requests to make at a time
    -t timelimit    Seconds to max. to spend on benchmarking
                    This implies -n 50000
    -s timeout      Seconds to max. wait for each response
                    Default is 30 seconds
    -b windowsize   Size of TCP send/receive buffer, in bytes
    -B address      Address to bind to when making outgoing connections
    -p postfile     File containing data to POST. Remember also to set -T
    -u putfile      File containing data to PUT. Remember also to set -T
    -T content-type Content-type header to use for POST/PUT data, eg.
                    'application/x-www-form-urlencoded'
                    Default is 'text/plain'
    -v verbosity    How much troubleshooting info to print
    -w              Print out results in HTML tables
    -i              Use HEAD instead of GET
    -x attributes   String to insert as table attributes
    -y attributes   String to insert as tr attributes
    -z attributes   String to insert as td or th attributes
    -C attribute    Add cookie, eg. 'Apache=1234'. (repeatable)
    -H attribute    Add Arbitrary header line, eg. 'Accept-Encoding: gzip'
                    Inserted after all normal header lines. (repeatable)
    -A attribute    Add Basic WWW Authentication, the attributes
                    are a colon separated username and password.
    -P attribute    Add Basic Proxy Authentication, the attributes
                    are a colon separated username and password.
    -X proxy:port   Proxyserver and port number to use
    -V              Print version number and exit
    -k              Use HTTP KeepAlive feature
    -d              Do not show percentiles served table.
    -S              Do not show confidence estimators and warnings.
    -q              Do not show progress when doing more than 150 requests
    -l              Accept variable document length (use this for dynamic pages)
    -g filename     Output collected data to gnuplot format file.
    -e filename     Output CSV file with percentages served
    -r              Don't exit on socket receive errors.
    -m method       Method name
    -h              Display usage information (this message)
    -I              Disable TLS Server Name Indication (SNI) extension
    -Z ciphersuite  Specify SSL/TLS cipher suite (See openssl ciphers)
    -f protocol     Specify SSL/TLS protocol
                    (SSL2, TLS1, TLS1.1, TLS1.2 or ALL)

ポイントとなるオプションは、

  • -n(requests) … 総リクエスト数
  • -c(concurrency) … 同時リクエスト数
  • -t(timelimit) … ベンチマークを実行する最大時間(総リクエスト数に達していなくても、この時間で打ち切る。デフォルトは制限時間なし)
  • -p (postfile) … POST時に送信する内容(HTTPボディ)を記載したファイルを指定
  • -u(putfile) … PUT時に送信する内容(HTTPボディ)を記載したファイルを指定
  • -T(content-type) … POSTやPUTを行う時のContent-Typeを指定(デフォルトは「text/plain」)
  • -H … 追加のHTTPヘッダを指定
  • -A … Basic認証を利用する際のユーザ名とパスワードを指定(「:」で区切る)
  • k … Keep-Aliveを使用する

といったところでしょうか。

Apache JMeterなどであるような、Ramp-Up期間(すべてのクライアントを起動させるまでの時間)はなく、いきなり
指定の同時リクエスト数でアクセスしようとします。

また、URLは単一指定なので、ページを順次遷移していくようなシナリオのようなことはできませんし、途中で
パラメータを変えるようなこともできません。

「-cで指定した同時リクエスト数」がユーザー数の見立てとなり、「-nで指定した値」を「-cで指定した値」で割ったものが、
ユーザーが実行するリクエスト数、ということになります。

リクエストとリクエストの間のwait的な時間も設定できないようなので、本当に一斉にリクエストを投げる感じに
なりますね。なるほど…。

例えば、以下の指定だと同時リクエスト数10で、それぞれが10,000回リクエストを実行することになる、と。

$ ab -n 100000 -c 10 http://...

試してみる

それでは、実際に試してみましょう。

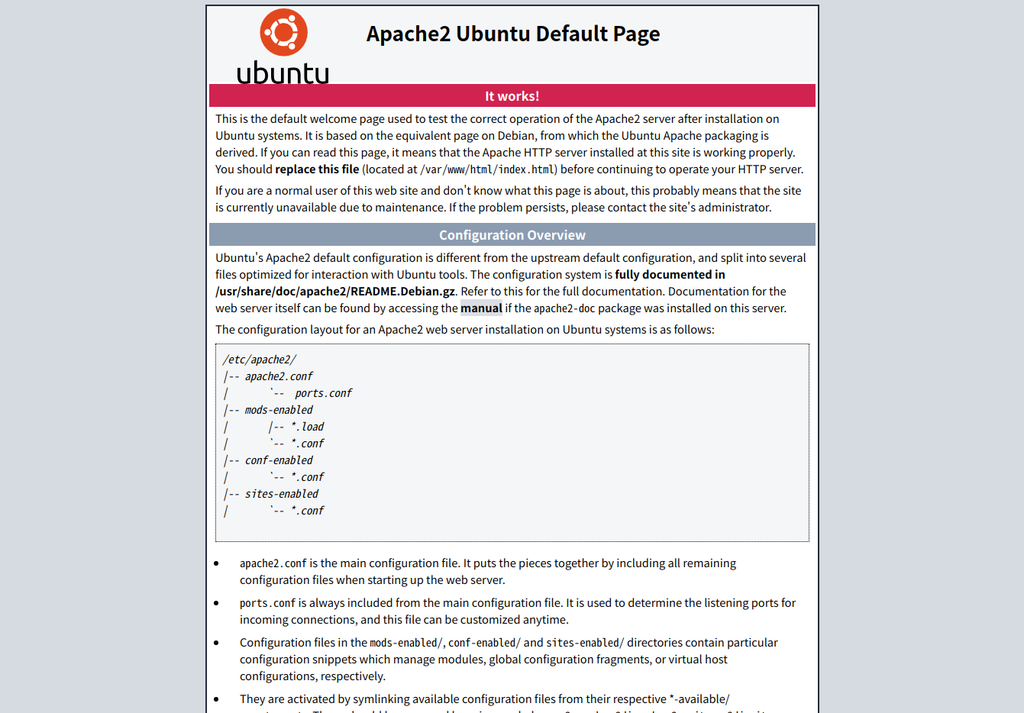
対象のサーバーは、Apacheとします。Ubuntu LinuxでインストールできるApache、デフォルトのままです。
f:id:Kazuhira:20190102233540p:plain

対象のサーバーのIPアドレスは、172.17.0.3とします。

では、同時アクセス数10、総リクエスト数100,000で実行。

$ ab -n 100000 -c 10 http://172.17.0.3/
This is ApacheBench, Version 2.3 <$Revision: 1807734 $>
Copyright 1996 Adam Twiss, Zeus Technology Ltd, http://www.zeustech.net/
Licensed to The Apache Software Foundation, http://www.apache.org/

Benchmarking 172.17.0.3 (be patient)
Completed 10000 requests
Completed 20000 requests
Completed 30000 requests
Completed 40000 requests
Completed 50000 requests
Completed 60000 requests
Completed 70000 requests
Completed 80000 requests
Completed 90000 requests
Completed 100000 requests
Finished 100000 requests


Server Software:        Apache/2.4.29
Server Hostname:        172.17.0.3
Server Port:            80

Document Path:          /
Document Length:        10918 bytes

Concurrency Level:      10
Time taken for tests:   9.074 seconds
Complete requests:      100000
Failed requests:        0
Total transferred:      1119200000 bytes
HTML transferred:       1091800000 bytes
Requests per second:    11019.96 [#/sec] (mean)
Time per request:       0.907 [ms] (mean)
Time per request:       0.091 [ms] (mean, across all concurrent requests)
Transfer rate:          120444.75 [Kbytes/sec] received

Connection Times (ms)
              min  mean[+/-sd] median   max
Connect:        0    0   0.1      0       9
Processing:     0    1   0.3      1      14
Waiting:        0    0   0.3      0      14
Total:          0    1   0.4      1      15

Percentage of the requests served within a certain time (ms)
  50%      1
  66%      1
  75%      1
  80%      1
  90%      1
  95%      1
  98%      1
  99%      2
 100%     15 (longest request)

ざっくり結果を見てみましょう。

「Complete requests」が実行したリクエスト数で、「Failed requests」が失敗したリクエスト数です。今回は、失敗した
リクエストはありません。

Complete requests:      100000
Failed requests:        0

HTTPステータスコードが2xx以外の応答を返した場合は、「Non-2xx responses」がカウントされて表示されます。

Non-2xx responses:      5000

1秒あたりのリクエスト数。今回は、11,019 request / secです。

Requests per second:    11019.96 [#/sec] (mean)

リクエストごとの平均時間。この値は、「Time taken for tests(テストにかかった時間(sec)」 × 1000 / done(Complete requests)で
算出されます。とっても単純。

Time per request:       0.091 [ms] (mean, across all concurrent requests)

なお、こっちの方は「concurrency(-n)」 × 「Time taken for tests(テストにかかった時間(sec)」 × 1000 / done(Complete requests)で
算出されます。

Time per request:       0.907 [ms] (mean)

ところで、アクセスログを見る限り、Apache BenchはHTTP/1.0でアクセスするようですね。

172.17.0.2 - - [02/Jan/2019:14:37:29 +0000] "GET / HTTP/1.0" 200 11192 "-" "ApacheBench/2.3"

とりあえず、使い方はなんとなくわかりました。

Linuxで起動中のプロセスの情報(実行コマンドや起動引数、環境変数など)を確認する

procファイルシステムの話。今まで部分的にしか見てこなかったので、もうちょっと見てみようかなと。

「/proc/[PID]」配下のディレクトリを調べると、プロセスに関する情報がいろいろと並んでいます。

例えば、WildFlyをダウンロードして起動してみます。

$ wget https://download.jboss.org/wildfly/15.0.0.Final/wildfly-15.0.0.Final.tar.gz
$ tar xf wildfly-15.0.0.Final.tar.gz
$ cd wildfly-15.0.0.Final
$ bin/standalone.sh

このプロセスの情報を見てみましょう。

「/proc/[PID]」配下を見てみる

これだけずらっと並びます。

$ ls -l /proc/[PID]
合計 0
dr-xr-xr-x  2 xxxxx xxxxx 0  1月  2 19:48 attr
-rw-r--r--  1 xxxxx xxxxx 0  1月  2 19:48 autogroup
-r--------  1 xxxxx xxxxx 0  1月  2 19:48 auxv
-r--r--r--  1 xxxxx xxxxx 0  1月  2 19:47 cgroup
--w-------  1 xxxxx xxxxx 0  1月  2 19:48 clear_refs
-r--r--r--  1 xxxxx xxxxx 0  1月  2 19:48 cmdline
-rw-r--r--  1 xxxxx xxxxx 0  1月  2 19:48 comm
-rw-r--r--  1 xxxxx xxxxx 0  1月  2 19:48 coredump_filter
-r--r--r--  1 xxxxx xxxxx 0  1月  2 19:48 cpuset
lrwxrwxrwx  1 xxxxx xxxxx 0  1月  2 19:48 cwd -> /path/to/wildfly-15.0.0.Final
-r--------  1 xxxxx xxxxx 0  1月  2 19:48 environ
lrwxrwxrwx  1 xxxxx xxxxx 0  1月  2 19:47 exe -> /usr/lib/jvm/java-8-openjdk-amd64/jre/bin/java
dr-x------  2 xxxxx xxxxx 0  1月  2 19:48 fd
dr-x------  2 xxxxx xxxxx 0  1月  2 19:48 fdinfo
-rw-r--r--  1 xxxxx xxxxx 0  1月  2 19:48 gid_map
-r--------  1 xxxxx xxxxx 0  1月  2 19:48 io
-r--r--r--  1 xxxxx xxxxx 0  1月  2 19:48 limits
-rw-r--r--  1 xxxxx xxxxx 0  1月  2 19:48 loginuid
dr-x------  2 xxxxx xxxxx 0  1月  2 19:48 map_files
-r--r--r--  1 xxxxx xxxxx 0  1月  2 19:47 maps
-rw-------  1 xxxxx xxxxx 0  1月  2 19:48 mem
-r--r--r--  1 xxxxx xxxxx 0  1月  2 19:47 mountinfo
-r--r--r--  1 xxxxx xxxxx 0  1月  2 19:48 mounts
-r--------  1 xxxxx xxxxx 0  1月  2 19:48 mountstats
dr-xr-xr-x  5 xxxxx xxxxx 0  1月  2 19:47 net
dr-x--x--x  2 xxxxx xxxxx 0  1月  2 19:48 ns
-r--r--r--  1 xxxxx xxxxx 0  1月  2 19:48 numa_maps
-rw-r--r--  1 xxxxx xxxxx 0  1月  2 19:48 oom_adj
-r--r--r--  1 xxxxx xxxxx 0  1月  2 19:48 oom_score
-rw-r--r--  1 xxxxx xxxxx 0  1月  2 19:48 oom_score_adj
-r--------  1 xxxxx xxxxx 0  1月  2 19:48 pagemap
-r--------  1 xxxxx xxxxx 0  1月  2 19:48 patch_state
-r--------  1 xxxxx xxxxx 0  1月  2 19:48 personality
-rw-r--r--  1 xxxxx xxxxx 0  1月  2 19:48 projid_map
lrwxrwxrwx  1 xxxxx xxxxx 0  1月  2 19:48 root -> /
-rw-r--r--  1 xxxxx xxxxx 0  1月  2 19:48 sched
-r--r--r--  1 xxxxx xxxxx 0  1月  2 19:48 schedstat
-r--r--r--  1 xxxxx xxxxx 0  1月  2 19:48 sessionid
-rw-r--r--  1 xxxxx xxxxx 0  1月  2 19:48 setgroups
-r--r--r--  1 xxxxx xxxxx 0  1月  2 19:48 smaps
-r--r--r--  1 xxxxx xxxxx 0  1月  2 19:48 smaps_rollup
-r--------  1 xxxxx xxxxx 0  1月  2 19:48 stack
-r--r--r--  1 xxxxx xxxxx 0  1月  2 19:48 stat
-r--r--r--  1 xxxxx xxxxx 0  1月  2 19:48 statm
-r--r--r--  1 xxxxx xxxxx 0  1月  2 19:47 status
-r--------  1 xxxxx xxxxx 0  1月  2 19:48 syscall
dr-xr-xr-x 66 xxxxx xxxxx 0  1月  2 19:48 task
-r--r--r--  1 xxxxx xxxxx 0  1月  2 19:48 timers
-rw-rw-rw-  1 xxxxx xxxxx 0  1月  2 19:48 timerslack_ns
-rw-r--r--  1 xxxxx xxxxx 0  1月  2 19:48 uid_map
-r--r--r--  1 xxxxx xxxxx 0  1月  2 19:48 wchan

プロセスの実行コマンドを確認する

「/proc/[PID]/exe」で確認することができます。

$ ls -l /proc/[PID]/exe
lrwxrwxrwx 1 xxxxx xxxxx 0  1月  2 19:47 /proc/15824/exe -> /usr/lib/jvm/java-8-openjdk-amd64/jre/bin/java

プロセスのカレントディレクトリを確認する

「/proc/[PID]/cwd」で確認することができます。

$ ls -l /proc/[PID]/cwd
lrwxrwxrwx 1 xxxxx xxxxx 0  1月  2 19:48 /proc/15824/cwd -> /path/to/wildfly-15.0.0.Final

プロセスの起動引数を確認する

「/proc/[PID]/cmdline 」で、プロセスの起動引数を確認することができます。

$ cat /proc/[PID]/cmdline 
/usr/lib/jvm/java-8-openjdk-amd64/bin/java-D[Standalone]-server-Xms64m-Xmx512m-XX:MetaspaceSize=96M-XX:MaxMetaspaceSize=256m-Djava.net.preferIPv4Stack=true-Djboss.modules.system.pkgs=org.jboss.byteman-Djava.awt.headless=true-Dorg.jboss.boot.log.file=/path/to/wildfly-15.0.0.Final/standalone/log/server.log-Dlogging.configuration=file:/path/to/wildfly-15.0.0.Final/standalone/configuration/logging.properties-jar/path/to/wildfly-15.0.0.Final/jboss-modules.jar-mp/path/to/wildfly-15.0.0.Final/modulesorg.jboss.as.standalone-Djboss.home.dir=/path/to/wildfly-15.0.0.Final-Djboss.server.base.dir=/path/to/wildfly-15.0.0.Final/standalone

ですが、これだと見づらい(NULLが区切りになっているため)ので、xargsコマンドを介して見るとよいでしょう。

$ xargs -0 -L1 -a /proc/[PID]/cmdline
/usr/lib/jvm/java-8-openjdk-amd64/bin/java
-D[Standalone]
-server
-Xms64m
-Xmx512m
-XX:MetaspaceSize=96M
-XX:MaxMetaspaceSize=256m
-Djava.net.preferIPv4Stack=true
-Djboss.modules.system.pkgs=org.jboss.byteman
-Djava.awt.headless=true
-Dorg.jboss.boot.log.file=/path/to/wildfly-15.0.0.Final/standalone/log/server.log
-Dlogging.configuration=file:/path/to/wildfly-15.0.0.Final/standalone/configuration/logging.properties
-jar
/path/to/wildfly-15.0.0.Final/jboss-modules.jar
-mp
/path/to/wildfly-15.0.0.Final/modules
org.jboss.as.standalone
-Djboss.home.dir=/path/to/wildfly-15.0.0.Final
-Djboss.server.base.dir=/path/to/wildfly-15.0.0.Final/standalone

Perl One Linerで置換してもよいかも…。

$ perl -wp -e 's!\0!\n!g' /proc/[PID]/cmdline 
/usr/lib/jvm/java-8-openjdk-amd64/bin/java
-D[Standalone]
-server
-Xms64m
-Xmx512m
-XX:MetaspaceSize=96M
-XX:MaxMetaspaceSize=256m
-Djava.net.preferIPv4Stack=true
-Djboss.modules.system.pkgs=org.jboss.byteman
-Djava.awt.headless=true
-Dorg.jboss.boot.log.file=/path/to/wildfly-15.0.0.Final/standalone/log/server.log
-Dlogging.configuration=file:/path/to/wildfly-15.0.0.Final/standalone/configuration/logging.properties
-jar
/path/to/wildfly-15.0.0.Final/jboss-modules.jar
-mp
/path/to/wildfly-15.0.0.Final/modules
org.jboss.as.standalone
-Djboss.home.dir=/path/to/wildfly-15.0.0.Final
-Djboss.server.base.dir=/path/to/wildfly-15.0.0.Final/standalone

よくよく見ると、stringsの方は一部情報が欠けている…。

プロセスの環境変数を確認する

「/proc/[PID]/environ」で、確認することができます。「cmdline」と同様、区切り文字がNULLになっていてcatなどだと
見づらいので、xargsか

$ xargs -0 -L1 -a /proc/[PID]/environ

NULL文字を置換して見るとよいでしょう。

$ perl -wp -e 's!\0!\n!g' /proc/[PID]/environ

プロセスの統計情報を確認する

「/proc/[PID]/stat」で確認します。

$ cat /proc/15824/stat
15824 (java) S 15779 15779 16476 34822 15779 1077936128 99846 0 0 0 1352 64 0 0 20 0 64 0 2802279 2325237760 97426 18446744073709551615 94907598200832 94907598203328 140724476552832 0 0 0 0 0 16800975 0 0 0 17 3 0 0 0 0 0 94907600301400 94907600302096 94907627917312 140724476554347 140724476555171 140724476555171 140724476559309 0

また、「/proc/[PID]/statm」ではメモリの関する情報を確認することができます。

$ cat /proc/[PID]/statm
567685 101396 7048 1 0 158617 0

が、これだと読みにくいので「/proc/[PID]/status」で見るのがよいでしょう。

$ cat /proc/[PID]/status
Name:   java
Umask:  0002
State:  S (sleeping)
Tgid:   15824
Ngid:   0
Pid:    15824
PPid:   15779
TracerPid:  0
Uid:    1000    1000    1000    1000
Gid:    1000    1000    1000    1000
FDSize: 512
Groups: 4 24 27 30 46 116 126 129 998 1000 
NStgid: 15824
NSpid:  15824
NSpgid: 15779
NSsid:  16476
VmPeak:  2305572 kB
VmSize:  2270740 kB
VmLck:         0 kB
VmPin:         0 kB
VmHWM:    392820 kB
VmRSS:    389704 kB
RssAnon:      361516 kB
RssFile:       28188 kB
RssShmem:          0 kB
VmData:   634140 kB
VmStk:       136 kB
VmExe:         4 kB
VmLib:     19432 kB
VmPTE:      1288 kB
VmSwap:        0 kB
HugetlbPages:          0 kB
CoreDumping:    0
Threads:    64
SigQ:   0/63222
SigPnd: 0000000000000000
ShdPnd: 0000000000000000
SigBlk: 0000000000000000
SigIgn: 0000000000000000
SigCgt: 2000000181005ccf
CapInh: 0000000000000000
CapPrm: 0000000000000000
CapEff: 0000000000000000
CapBnd: 0000003fffffffff
CapAmb: 0000000000000000
NoNewPrivs: 0
Seccomp:    0
Speculation_Store_Bypass:   thread vulnerable
Cpus_allowed:   ff
Cpus_allowed_list:  0-7
Mems_allowed:   00000000,00000000,00000000,00000000,00000000,00000000,00000000,00000000,00000000,00000000,00000000,00000000,00000000,00000000,00000000,00000000,00000000,00000000,00000000,00000000,00000000,00000000,00000000,00000000,00000000,00000000,00000000,00000000,00000000,00000000,00000000,00000001
Mems_allowed_list:  0
voluntary_ctxt_switches:    1
nonvoluntary_ctxt_switches: 0

プロセスが開いているファイルを確認する

正確には、File Descriptor、ですが。

「/proc/[PID]/fd」ディレクトリ配下を参照しましょう。

$ ls -l /proc/[PID]/fd
合計 0
lrwx------ 1 xxxxx xxxxx 64  1月  2 20:08 0 -> /dev/pts/6
lrwx------ 1 xxxxx xxxxx 64  1月  2 20:08 1 -> /dev/pts/6
lr-x------ 1 xxxxx xxxxx 64  1月  2 20:08 10 -> /usr/lib/jvm/java-8-openjdk-amd64/jre/lib/ext/localedata.jar
lr-x------ 1 xxxxx xxxxx 64  1月  2 20:08 100 -> /path/to/wildfly-15.0.0.Final/modules/system/layers/base/javax/enterprise/concurrent/api/main/jboss-concurrency-api_1.0_spec-1.0.2.Final.jar
lr-x------ 1 xxxxx xxxxx 64  1月  2 20:08 101 -> /path/to/wildfly-15.0.0.Final/modules/system/layers/base/io/reactivex/rxjava2/rxjava/main/rxjava-2.2.2.jar
lr-x------ 1 xxxxx xxxxx 64  1月  2 20:08 102 -> /path/to/wildfly-15.0.0.Final/modules/system/layers/base/javax/interceptor/api/main/jboss-interceptors-api_1.2_spec-1.0.1.Final.jar
lr-x------ 1 xxxxx xxxxx 64  1月  2 20:08 103 -> /path/to/wildfly-15.0.0.Final/modules/system/layers/base/org/jboss/as/naming/main/wildfly-naming-15.0.0.Final.jar
lr-x------ 1 xxxxx xxxxx 64  1月  2 20:08 104 -> /path/to/wildfly-15.0.0.Final/modules/system/layers/base/org/jboss/jboss-transaction-spi/main/jboss-transaction-spi-7.6.0.Final.jar
lr-x------ 1 xxxxx xxxxx 64  1月  2 20:08 105 -> /path/to/wildfly-15.0.0.Final/modules/system/layers/base/org/hibernate/validator/main/hibernate-validator-6.0.13.Final.jar
lr-x------ 1 xxxxx xxxxx 64  1月  2 20:08 106 -> /path/to/wildfly-15.0.0.Final/modules/system/layers/base/org/glassfish/javax/enterprise/concurrent/main/javax.enterprise.concurrent-1.0.jar
lr-x------ 1 xxxxx xxxxx 64  1月  2 20:08 107 -> /path/to/wildfly-15.0.0.Final/modules/system/layers/base/org/wildfly/http-client/ejb/main/wildfly-http-ejb-client-1.0.12.Final.jar
lr-x------ 1 xxxxx xxxxx 64  1月  2 20:08 108 -> /path/to/wildfly-15.0.0.Final/modules/system/layers/base/javax/ejb/api/main/jboss-ejb-api_3.2_spec-1.0.1.Final.jar
lr-x------ 1 xxxxx xxxxx 64  1月  2 20:08 109 -> /path/to/wildfly-15.0.0.Final/modules/system/layers/base/org/jboss/security/negotiation/main/jboss-negotiation-common-3.0.4.Final.jar
lr-x------ 1 xxxxx xxxxx 64  1月  2 20:08 11 -> /usr/lib/jvm/java-8-openjdk-amd64/jre/lib/ext/sunpkcs11.jar
lr-x------ 1 xxxxx xxxxx 64  1月  2 20:08 110 -> /path/to/wildfly-15.0.0.Final/modules/system/layers/base/net/jcip/main/jcip-annotations-1.0.jar

〜省略〜

プロセスに適用されている、リソース制限を確認する

いわゆる、limitsです。「/proc/[PID]/limits」で確認します。

$ cat /proc/[PID]/limits
Limit                     Soft Limit           Hard Limit           Units     
Max cpu time              unlimited            unlimited            seconds   
Max file size             unlimited            unlimited            bytes     
Max data size             unlimited            unlimited            bytes     
Max stack size            8388608              unlimited            bytes     
Max core file size        0                    unlimited            bytes     
Max resident set          unlimited            unlimited            bytes     
Max processes             63222                63222                processes 
Max open files            1048576              1048576              files     
Max locked memory         16777216             16777216             bytes     
Max address space         unlimited            unlimited            bytes     
Max file locks            unlimited            unlimited            locks     
Max pending signals       63222                63222                signals   
Max msgqueue size         819200               819200               bytes     
Max nice priority         0                    0                    
Max realtime priority     0                    0                    
Max realtime timeout      unlimited            unlimited            us

スレッドに関する情報を見る

「/proc/[PID]/task/[ThreadID]」配下に、「/proc/[PID]」と同じ構造のディレクトリ構成が並んでいます。

lsで見るとaskディレクトリ配下にスレッドのIDがずらっと並んでいるので、一覧を見て、さらにその中身を
見てみるとよいでしょう。

$ ls -l /proc/[PID]/task

その他

  • /proc/[PID]/maps … マッピングされているメモリ情報
  • /proc/[PID]sched … CPUスケジューラ統計
  • /proc/[PID]/schedstat … CPUの実行時間、レイテンシ、タイムスライス
  • /proc/[PID]/smaps … マッピングされているメモリ領域とその使用状況

こんなところでしょうか。いろいろわかるものですねぇ。

参考情報

procfs - Wikipedia

Linux Filesystem Hierarchy / /proc

Linux System Administrators Guide / The /proc filesystem

/proc/配下のディレクトリ

procファイルシステム配下のトップレベルファイル

bash - How do I split a "/proc/*/environ" file in separate lines? - Ask Ubuntu